First Time Setup
Follow along with this guide to set up your Omega2 for the first time. We’ll first learn how to properly connect your Omega to a Dock and power it up. Then we’ll connect to it to use the Setup Wizard to have it connect to your WiFi network and then do some updates.
If you experience issues at any point in the process, try checking our Troublshooting guide.
The Video
Follow along with our getting started video:
It covers all of the steps that are listed below!
Unboxing and Getting the Hardware Ready
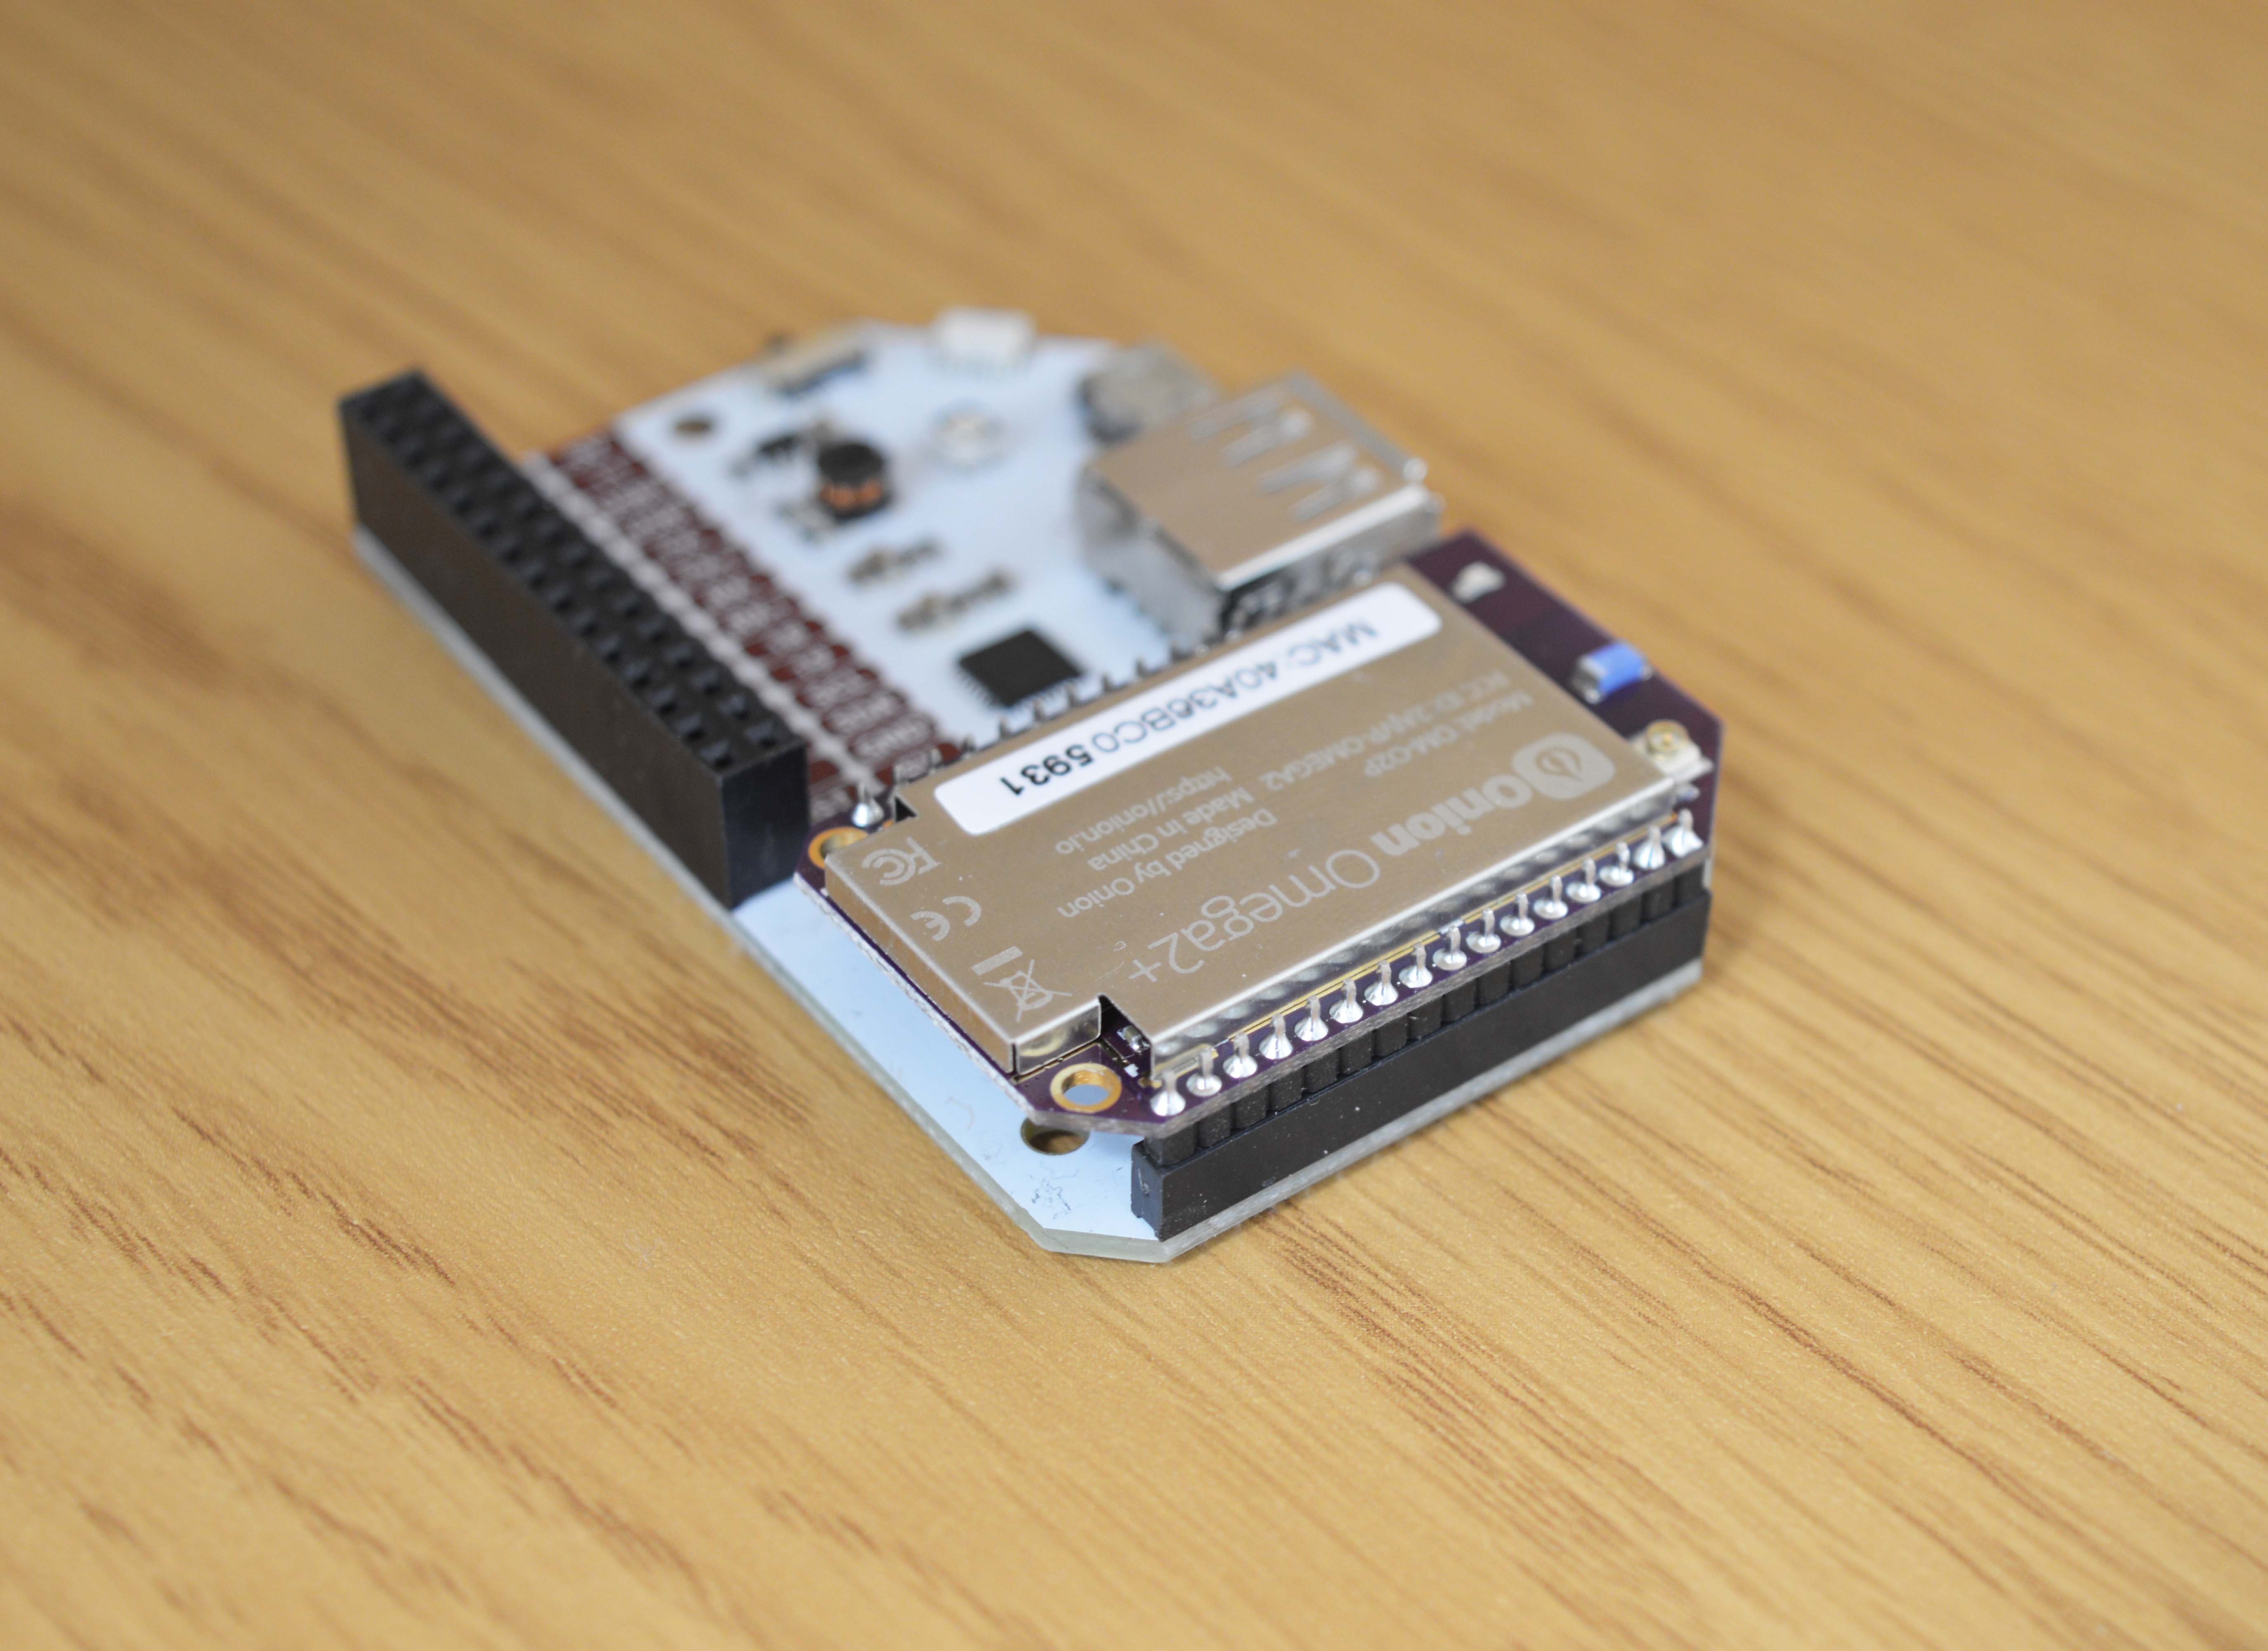
This guide assumes you have an Omega and a Dock. If you didn’t purchase a Dock, follow our guide on powering the Omega with no Dock.
Unpack
Unpack the Omega and Dock from their boxes

Connect
Plug the Omega into the socket on the Dock

Make sure your Omega’s pins are fully plugged into the socket
Provide Power
The Omega itself is powered by a 3.3V source. But all Omega Docks have voltage regulators so you can use any microUSB to power the Dock and Omega.
You can power it with your computer

Or you can power it with any wall adapter
Power On!
Turn on the Omega using the switch.

Wait till it boots
The amber LED on your Omega should turn on and then start blinking after about 10 seconds. In about a minute, the LED will stop blinking and remain solid, this means that the Omega has completed its boot sequence!
It’s possible that your Omega will behave a little differently: if the amber LED on your Omega turns on and remains on, wait for about a minute, and your Omega will have booted.

Using the Setup Wizard
Some Computer Configuration
Your computer may need some additional programs to access the Omega through a browser:
- If you are using Windows, install Apple’s Bonjour Service
- If you are using OS X, you’re all set to go
- If you are using Linux, the Zeroconf services should already be installed and you will be good to go
The Omega’s Name
Let’s find your Omega’s name before going any further.
There’s a sticker on the Omega’s shielding:
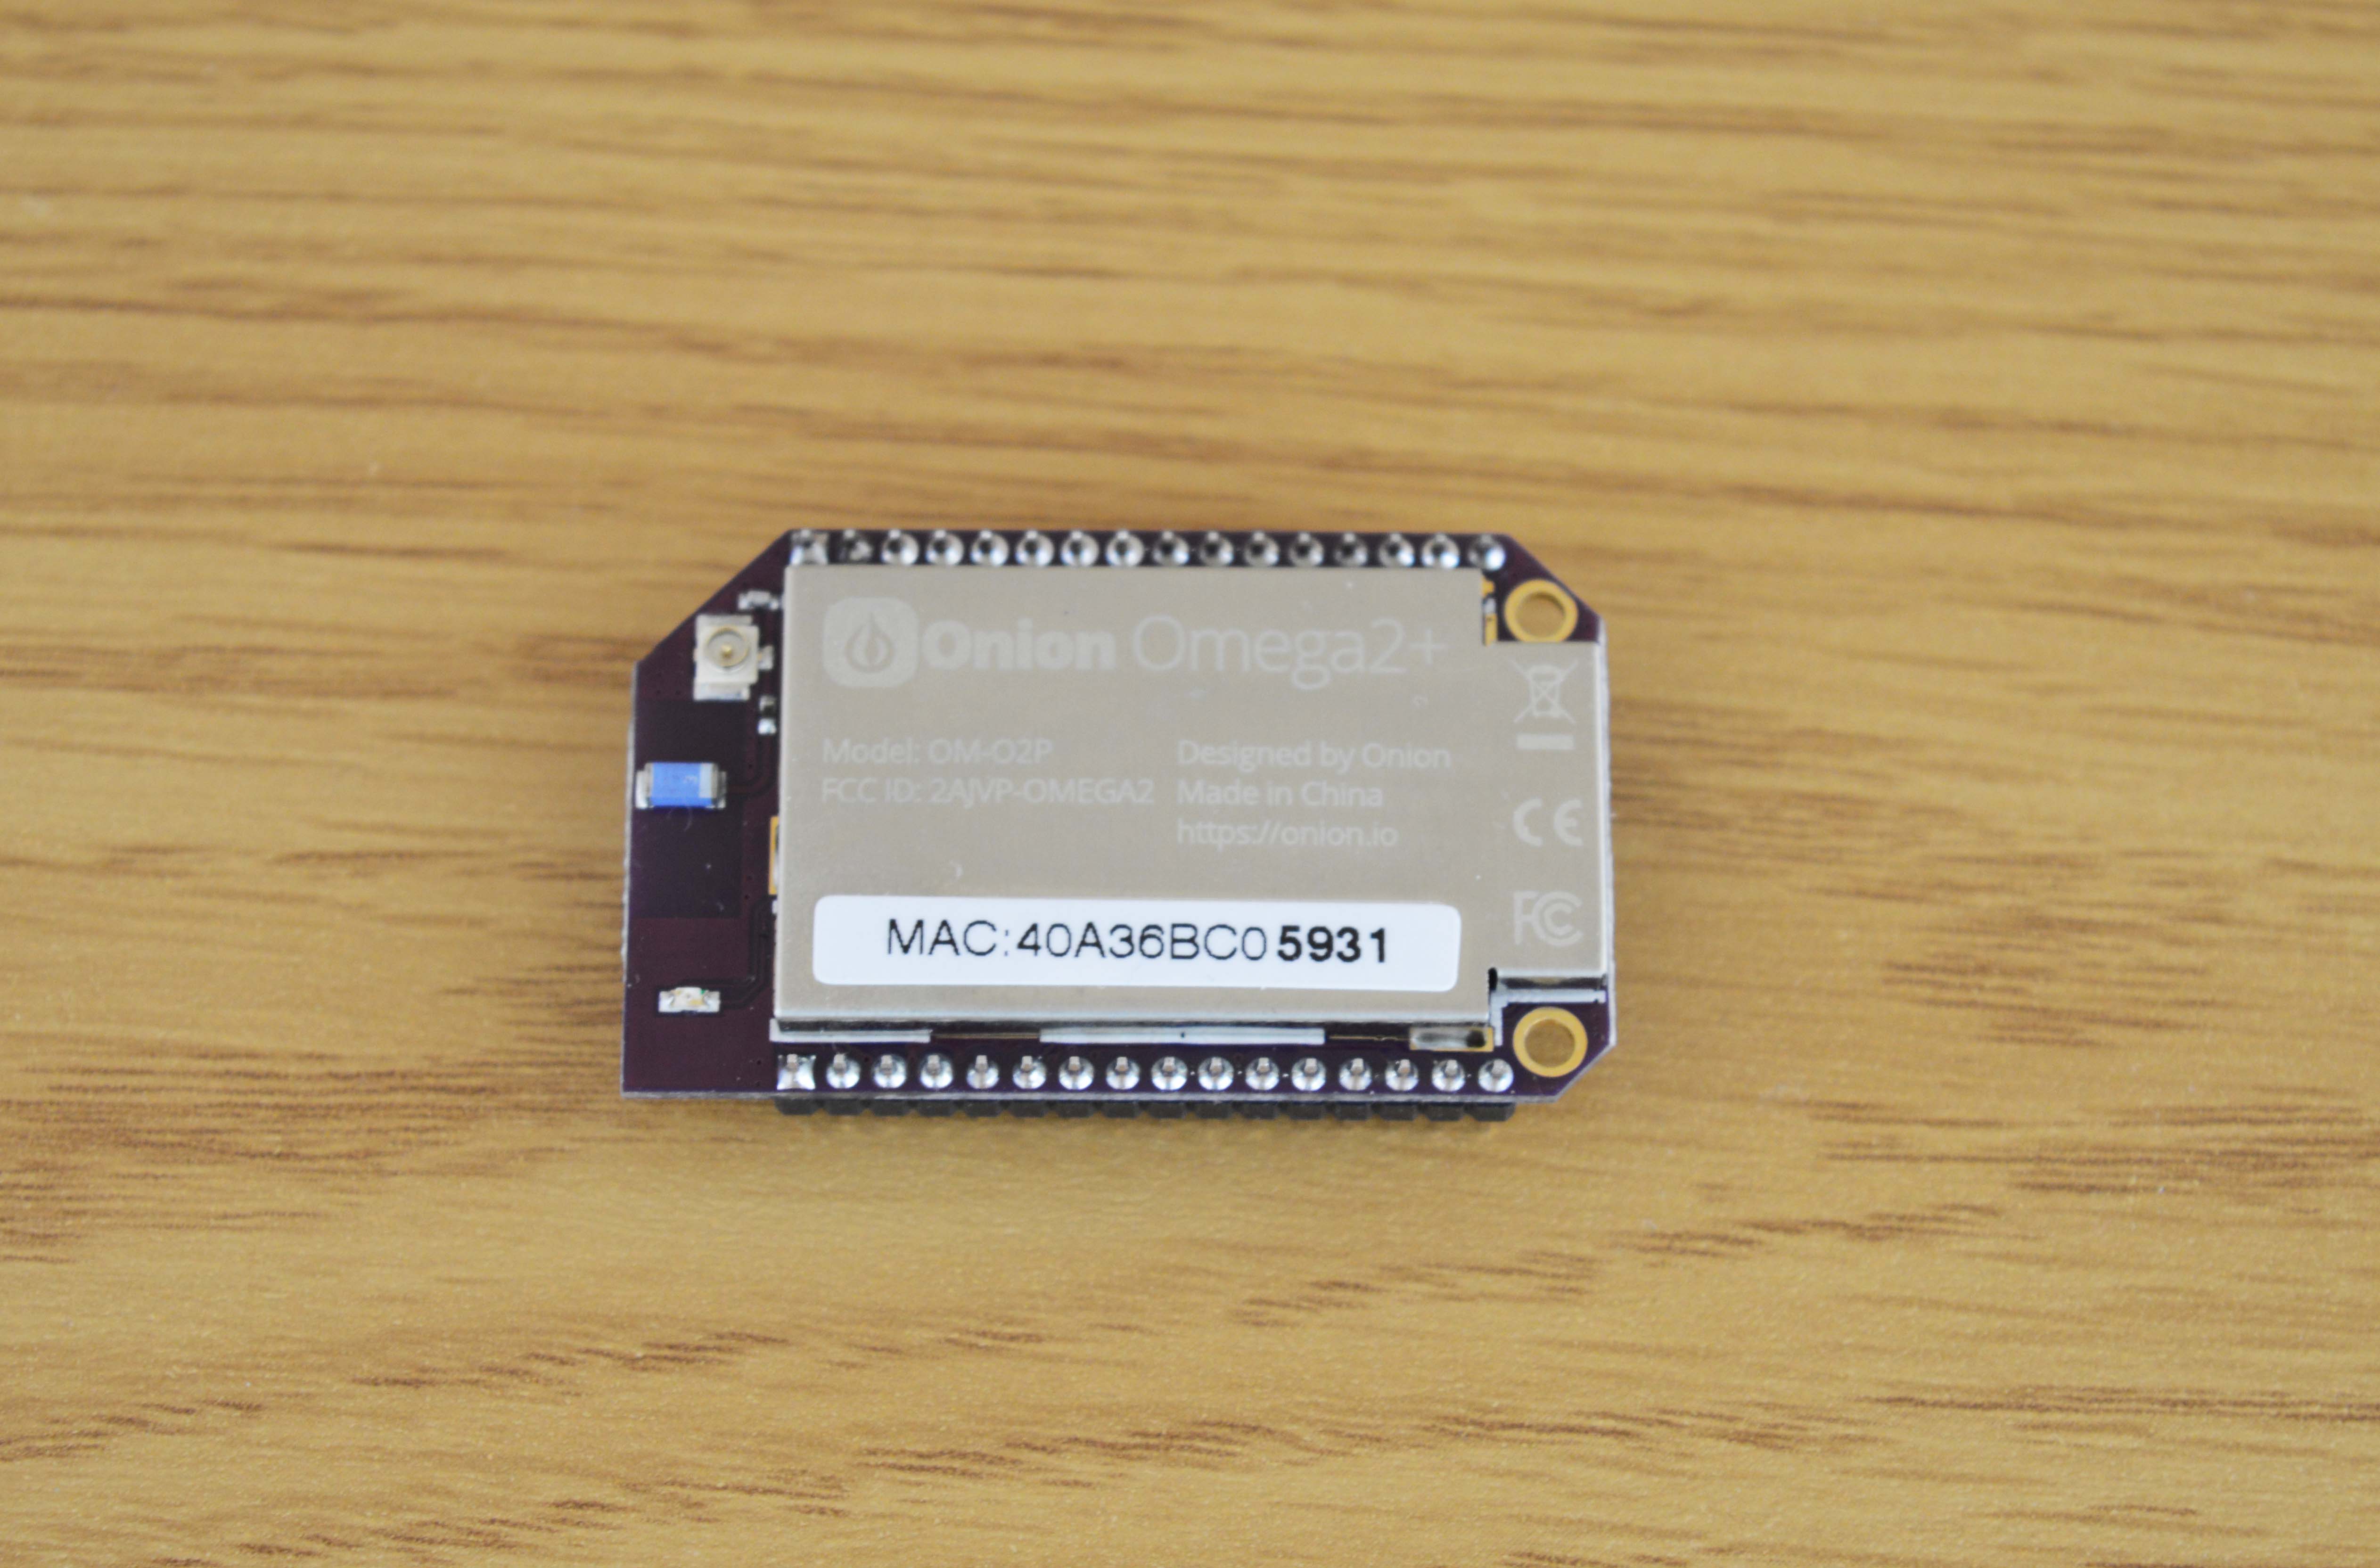
The text printed here is the Omega’s unique MAC address, we’re interested in the last four digits that are in bold. Your Omega’s name is Omega-ABCD where ABCD are the last four digits from the sticker.
So the Omega from the picture above is named Omega-5931
Connect to the Omega’s WiFi Network
The Omega hosts it’s own WiFi network access point. Lets connect your computer to it. The WiFi network is named the same as your Omega and the default password is 12345678

The Setup Wizard
Open your favourite browser and navigate to http://omega-ABCD.local/ where ABCD are the same characters from the network name above. If the page doesn’t load, you can also browse to http://192.168.3.1
You have now arrived at the Setup Wizard:

Login with the Omega’s default credentials:
username: root
password: onioneer
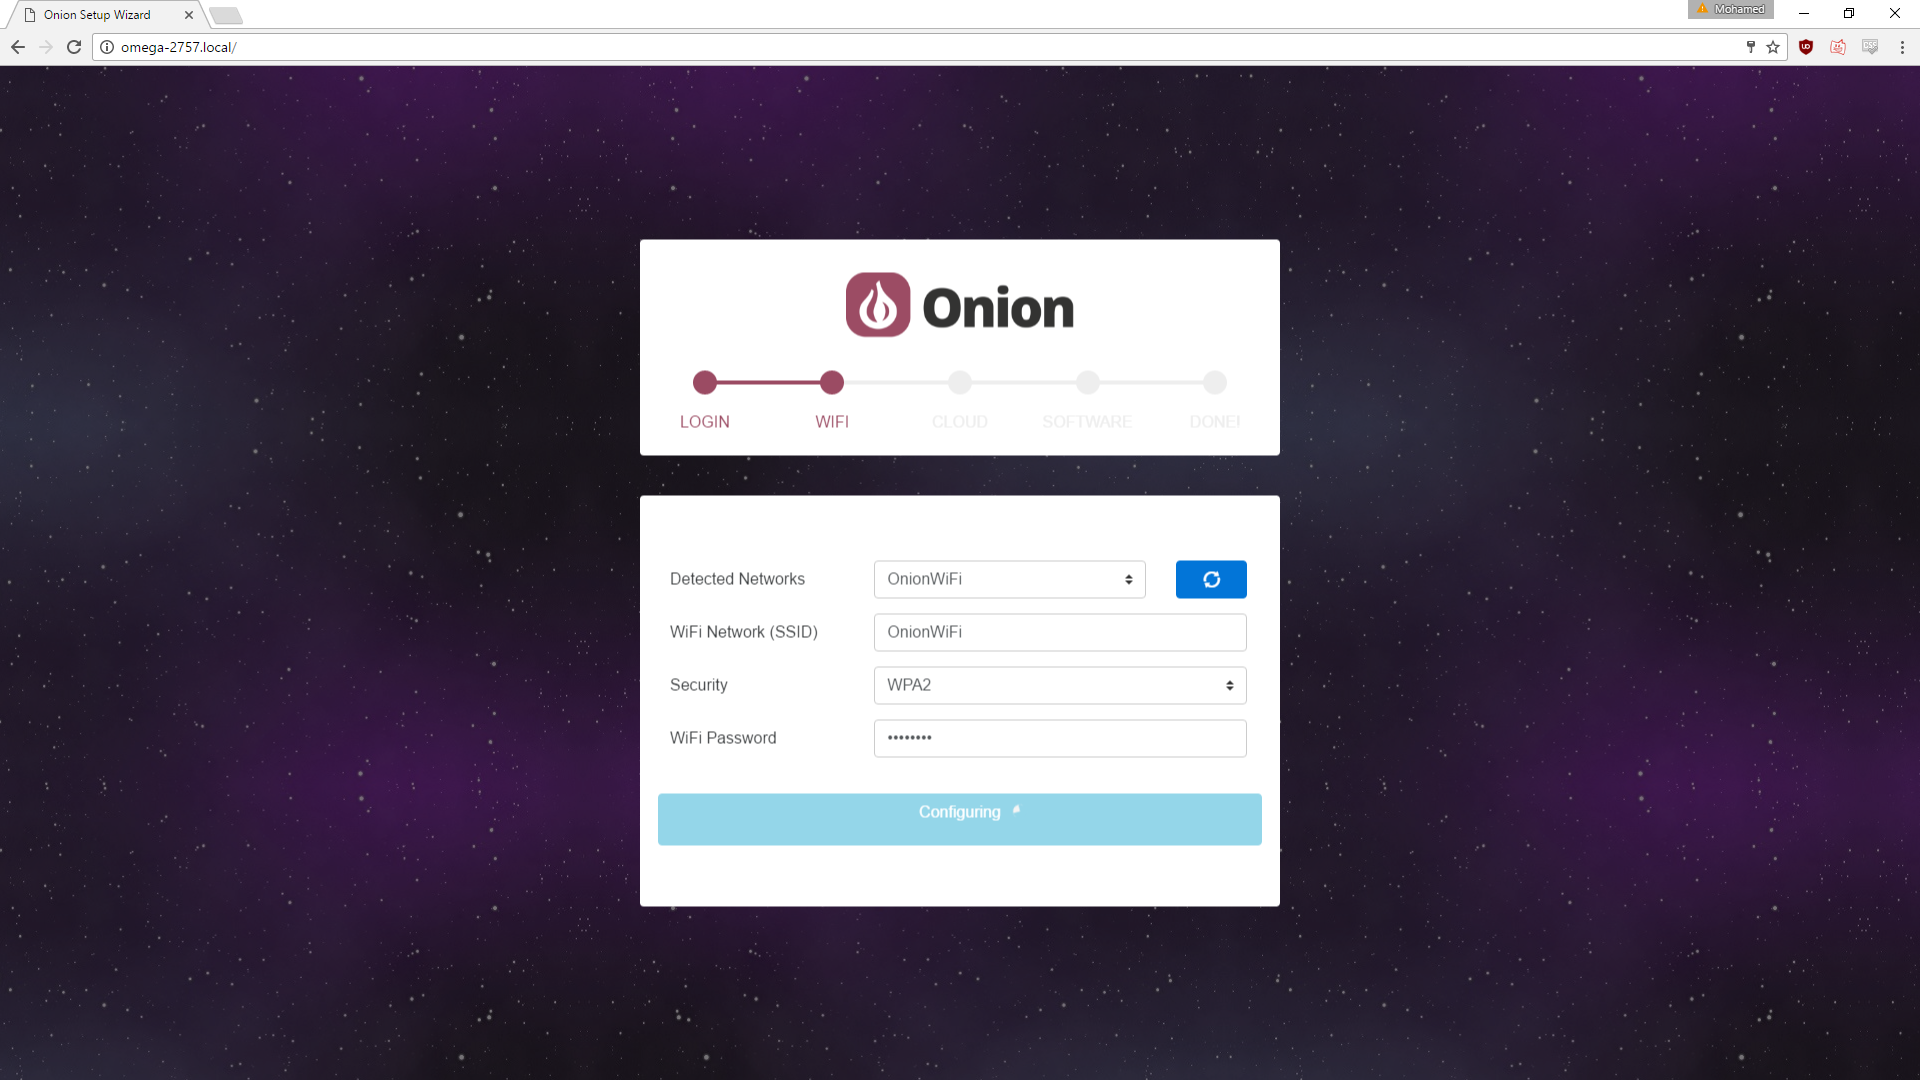
After you’ve logged in you’ll be asked to connect to a Wireless Network. This is MANDATORY in order to complete the Setup Wizard.
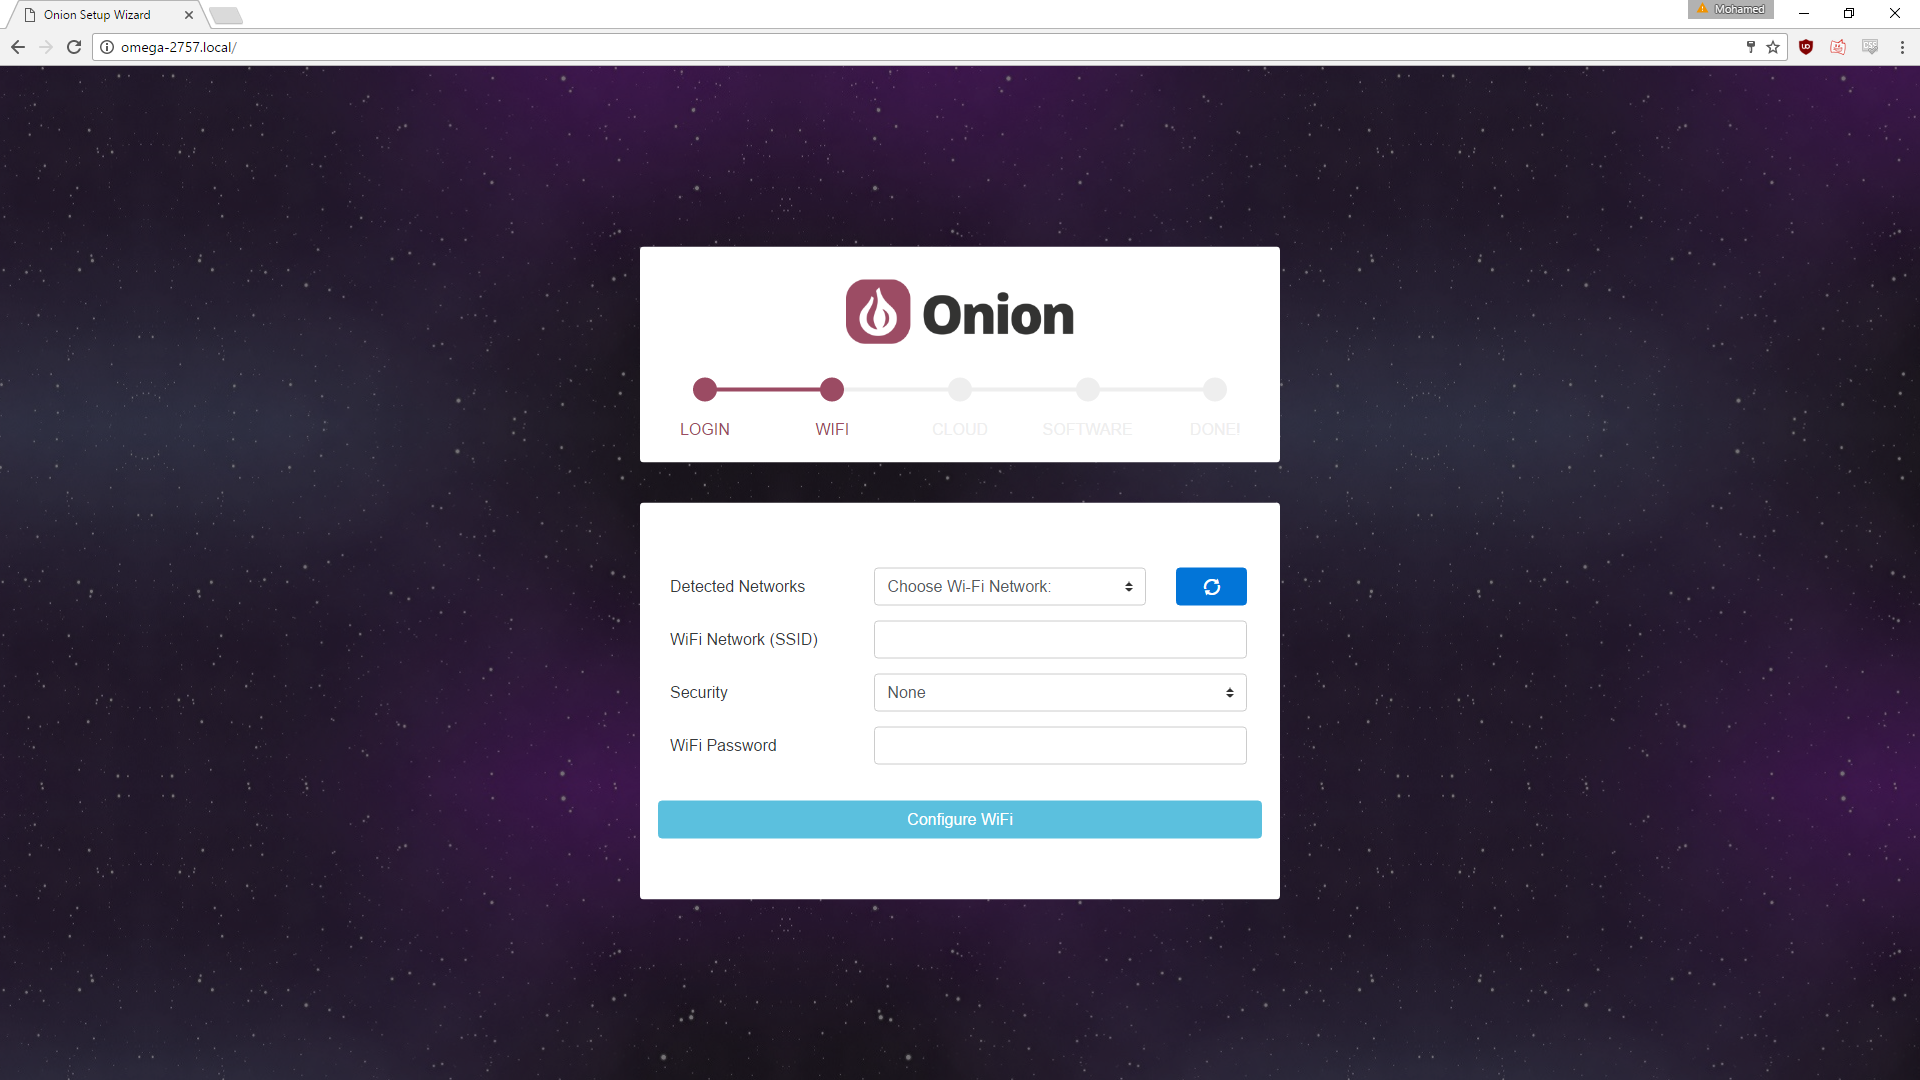
Enter your Wireless Network information and click Configure. Your Omega will attempt to connect to the network. This can take up to a minute to complete.
The Omega’s AP will go down and not be accessible during this process, sit tight, it’ll come back up when the configuration is done!
Once connected, you will be moved to the next step.
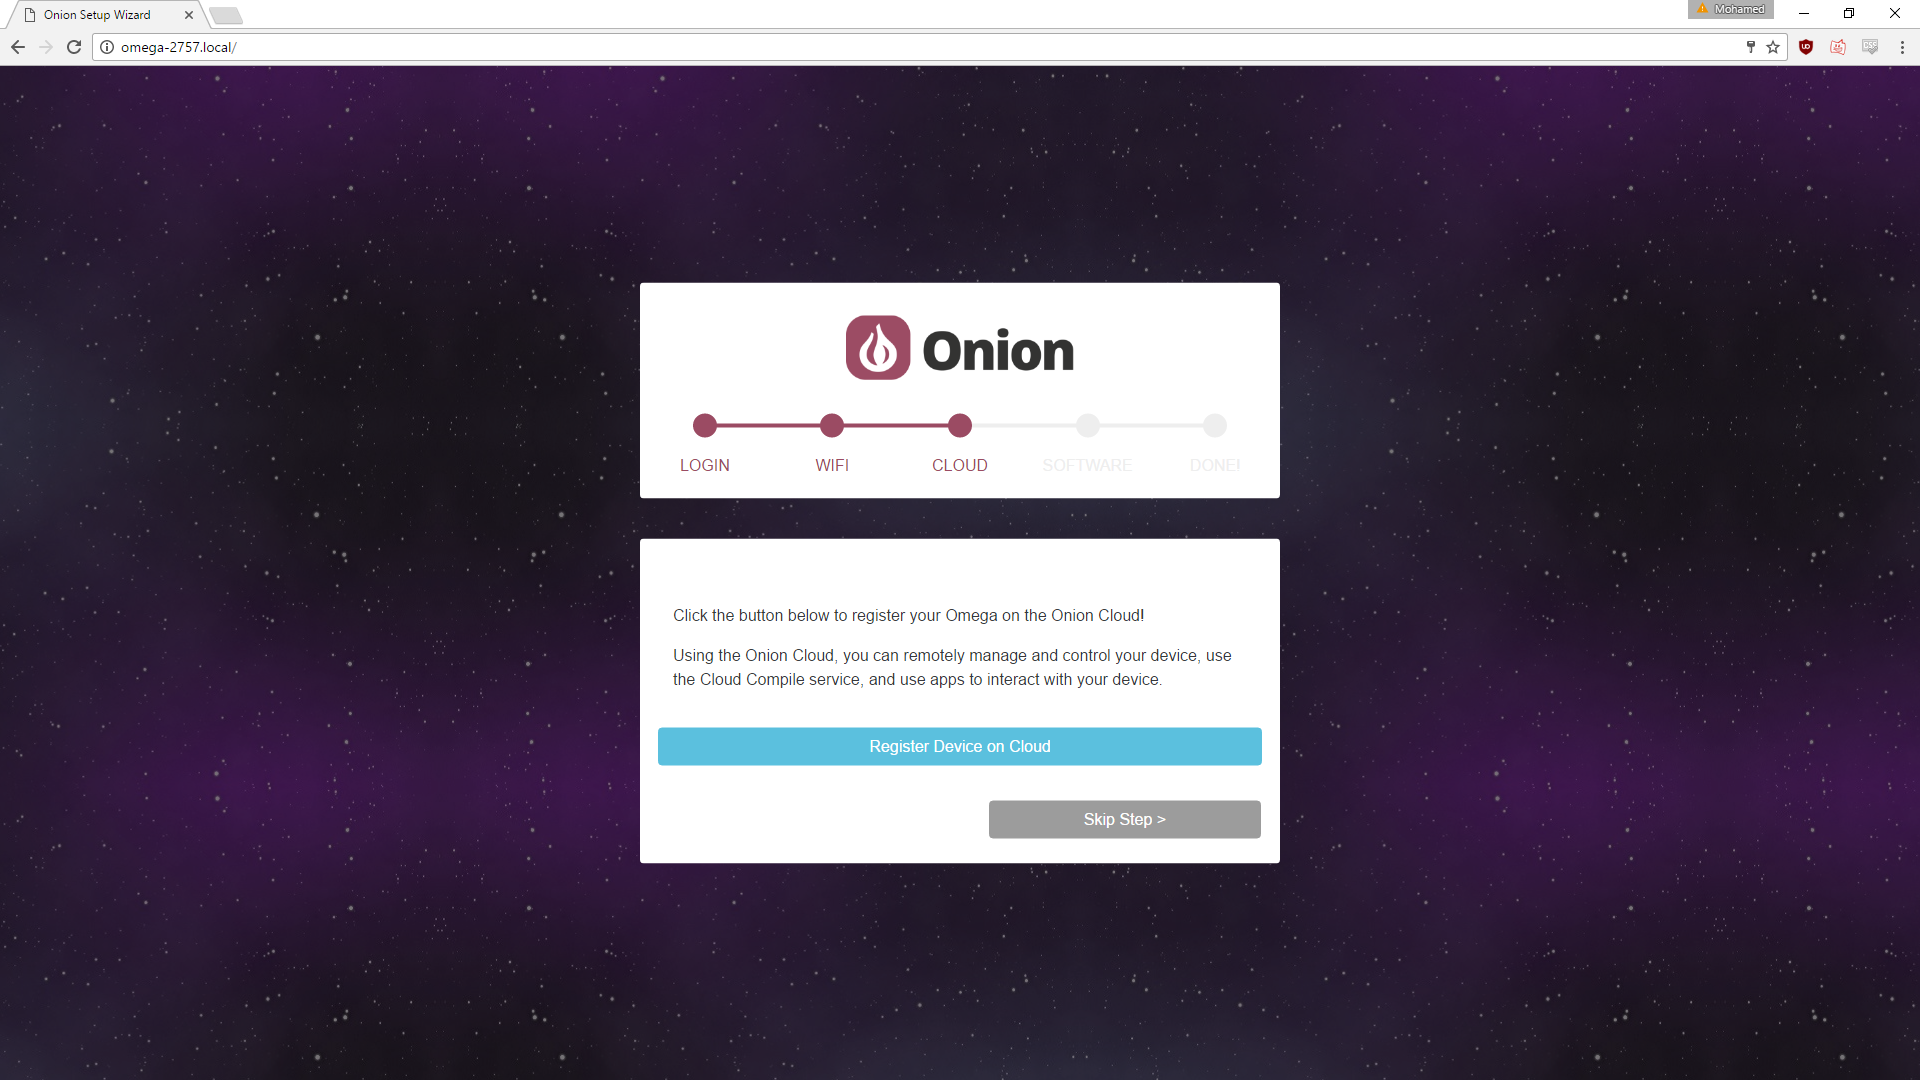
On this step you can choose to register your device on the cloud. If you would like to do this some other time you can click Skip Step to move onto the next step.
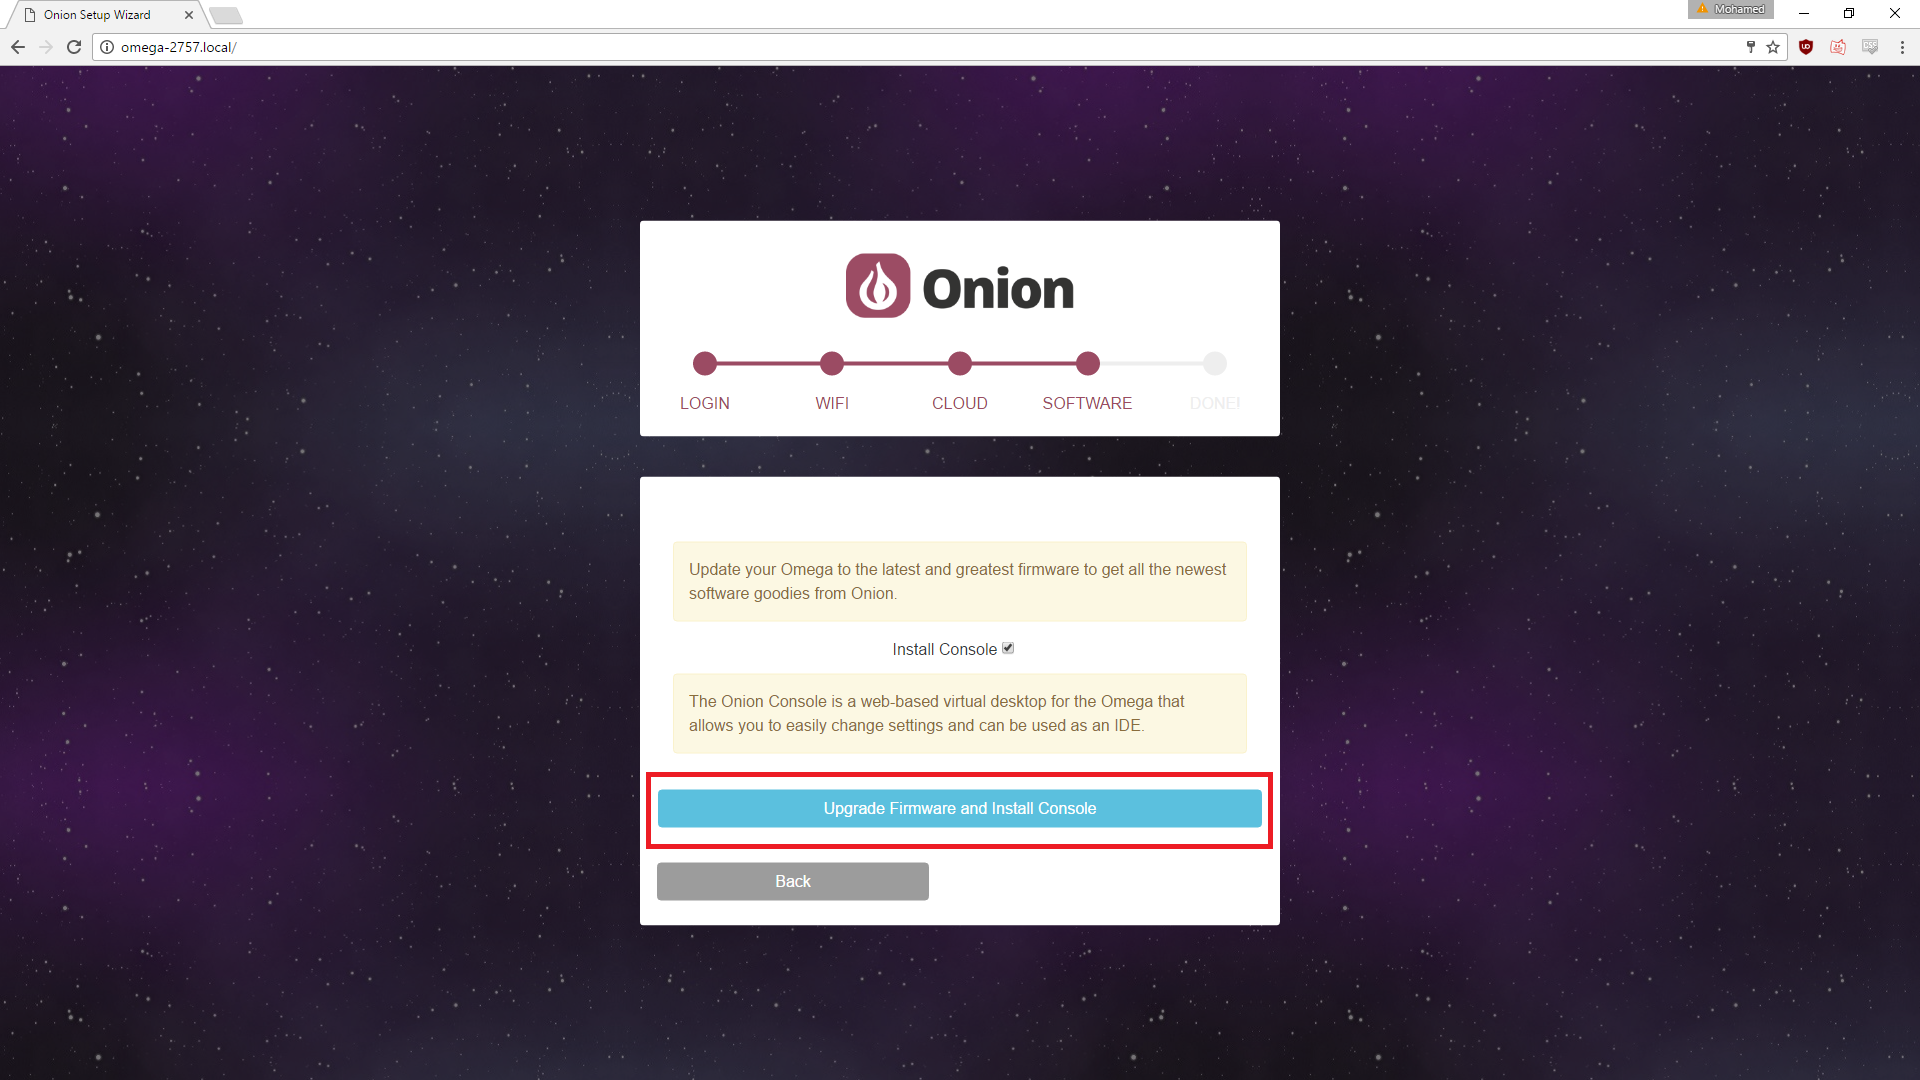
You’ve nearly finished now. Click the Upgrade Firmware and Install Console button to do just that. This will upgrade your Omega to the latest firmware and install the Console for you.
If you don’t want to install the Console you can de-select the checkbox above. You can always come back to the setup wizard to install the console afterwards.
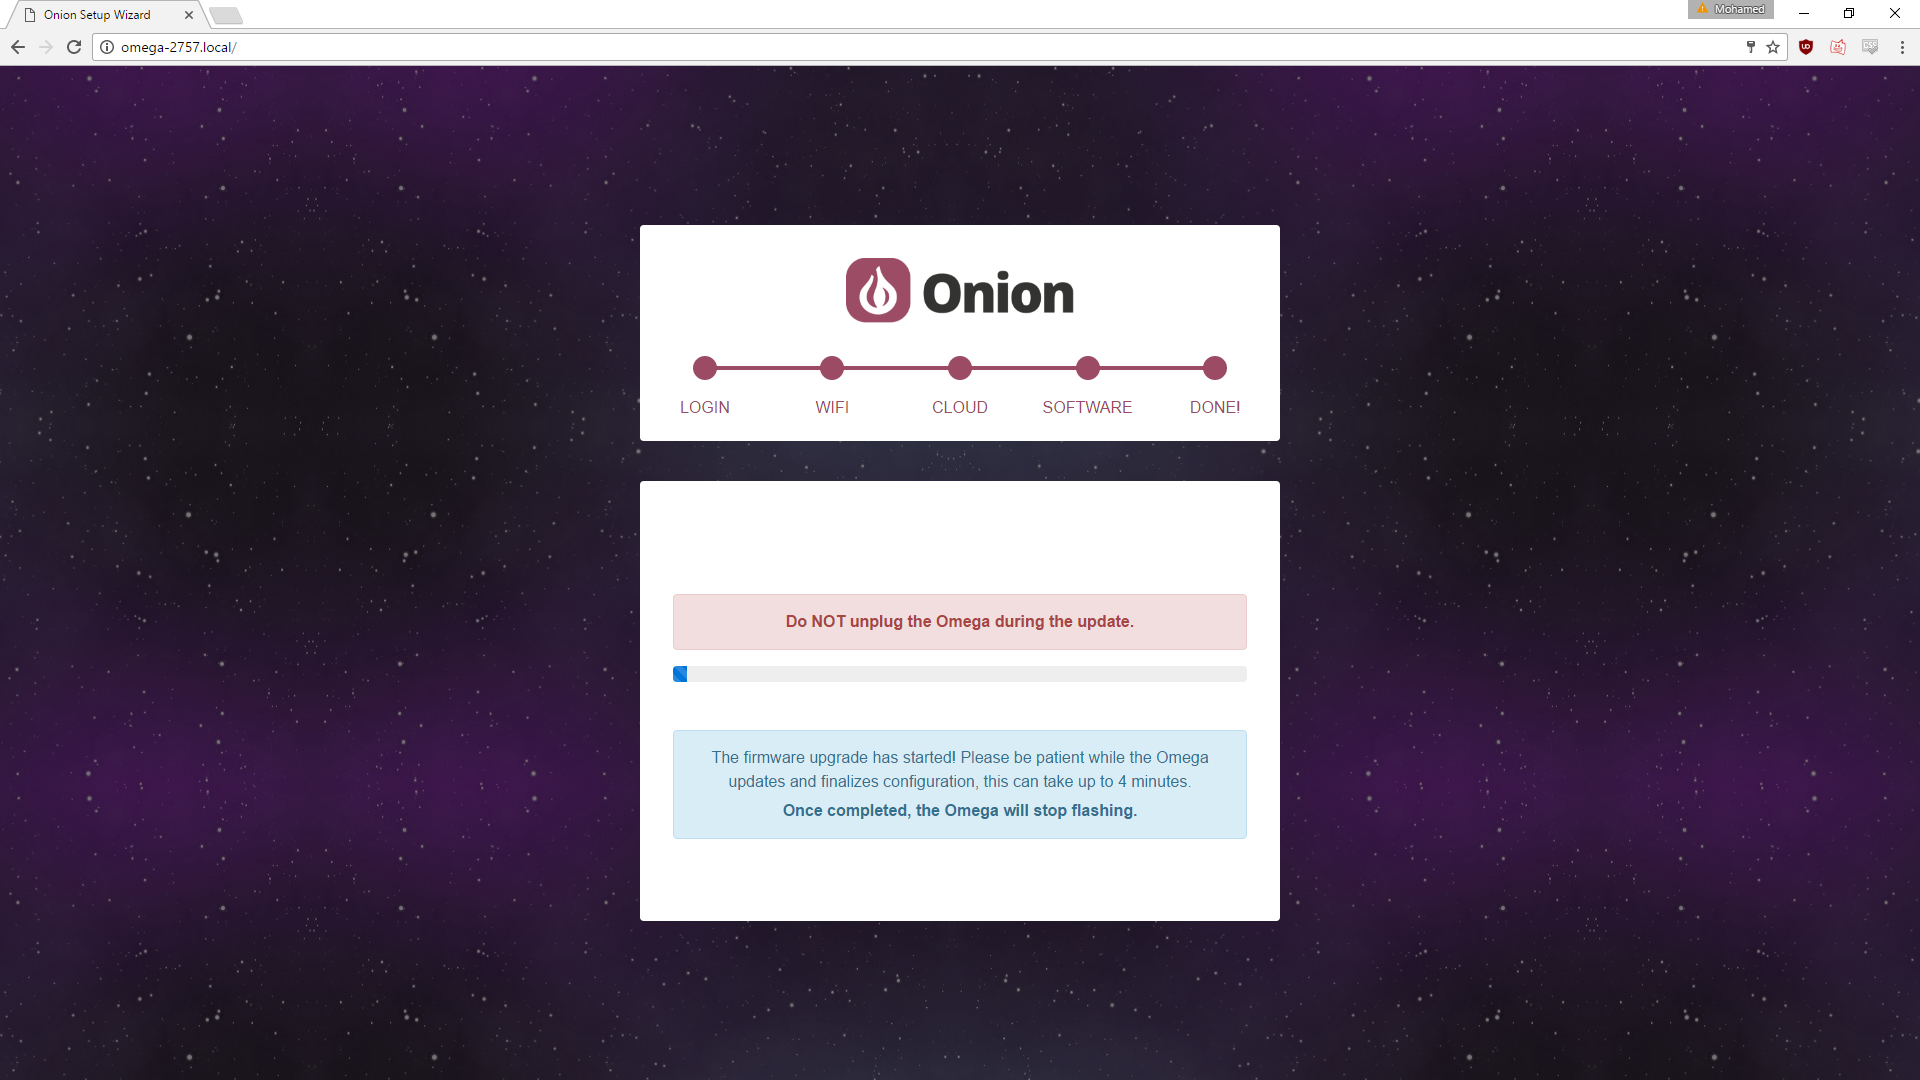
Your Omega will download the latest firmware, and then begin installing it. This process takes several minutes, sometimes more depending on your Internet connection.
When the firmware installation is complete you’ll see the page below:
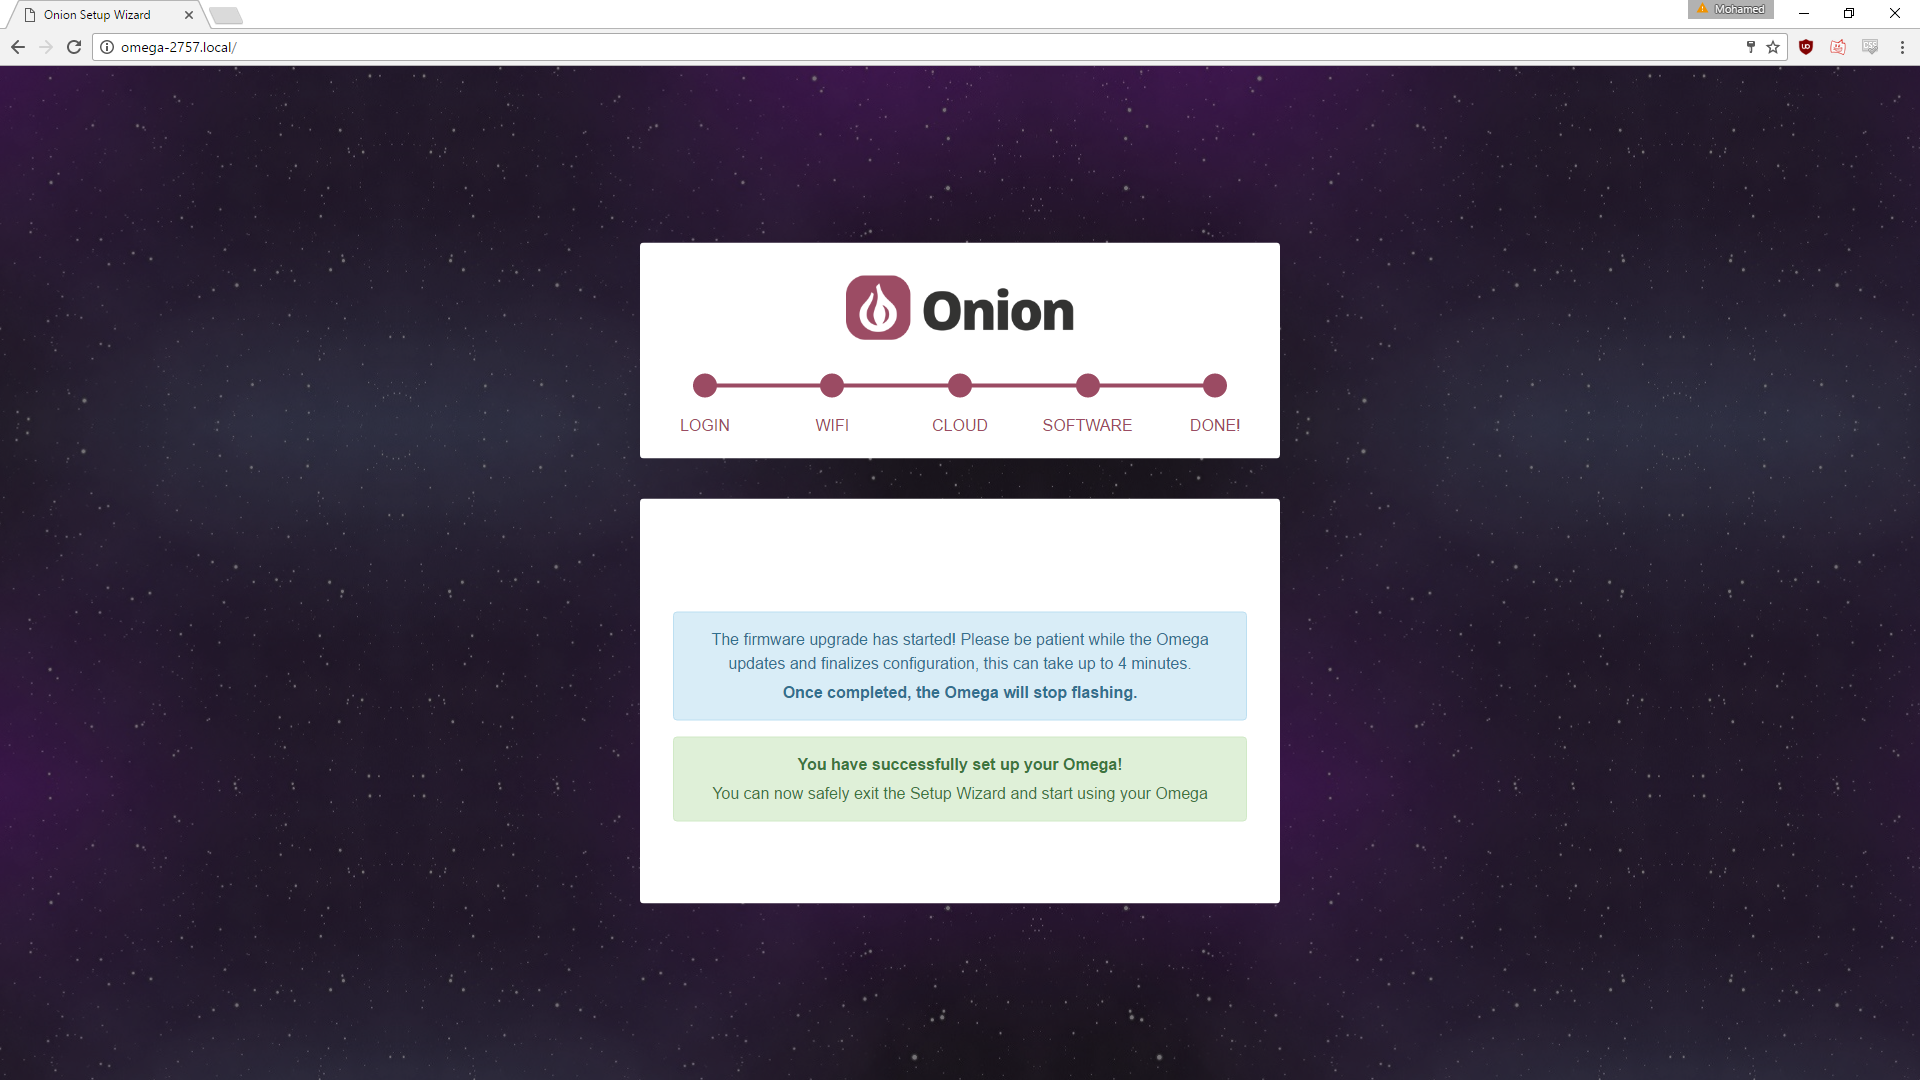
At the end of the installation process, the Omega will automatically reboot. It will be ready for use when the Omega’s LED stops flashing and remains solid.
Some Omega2+ models may not reboot automatically. If you reach the page pictured above and your Omega2+’s LED turns off and remains off for longer than about 15 seconds, you will need to manually reboot your Omega.
Either toggle the power switch on your Dock or disconnect the power briefly and reconnect it, and your Omega2+ will reboot and complete the upgrade. It will be ready for use when the LED stops flashing and remains solid.
All Done!
Start using your fresh Omega, check out the Using the Omega section for ideas on what the Omega can do!
The Setup Wizard Didn’t Work!
If for some reason the Setup Wizard wasn’t able to get your Omega up and running, try the steps in the First Time Setup using the Command Line guide or see the Troubleshooting guide.