Updating the Bootloader
This guide illustrates how to update the bootloader running on your Omega2 device. The bootloader will be updated by using the web recovery feature to flash a new bootloader to the Omega’s internal memory. You will need access to the serial console on UART0 and the Ethernet port to make use of the web recovery feature.
Upgrading the bootloader will let you take advantage of our latest development efforts on the bootloader. The most notable improvement is that all pins will now stay stable and their power-on-reset values during boot.
See the full summary of bootloader changes here: https://github.com/OnionIoT/omega2-bootloader/blob/master/OMEGA2-CHANGELOG.md
Step 1: Get Everything Together
Gather the hardware ingredients:
- The target Omega2 device
- Access to Omega’s serial console on UART0 and Ethernet Port
- If using a through-hole Omega2/2+: Expansion Dock and Ethernet Expansion
- If using a surface-mount Omega2S/2S+: Omega2S Development Kit
- Ethernet Cable
- MicroUSB Cable
Optional: If you want to check which release of the bootloader your device is currently running, see the Checking your Bootloader Version section below.
Step 2: Downloading Bootloader Binary
Before we proceed to the actual flashing process, we need to download the bootloader binary that we wish to flash.
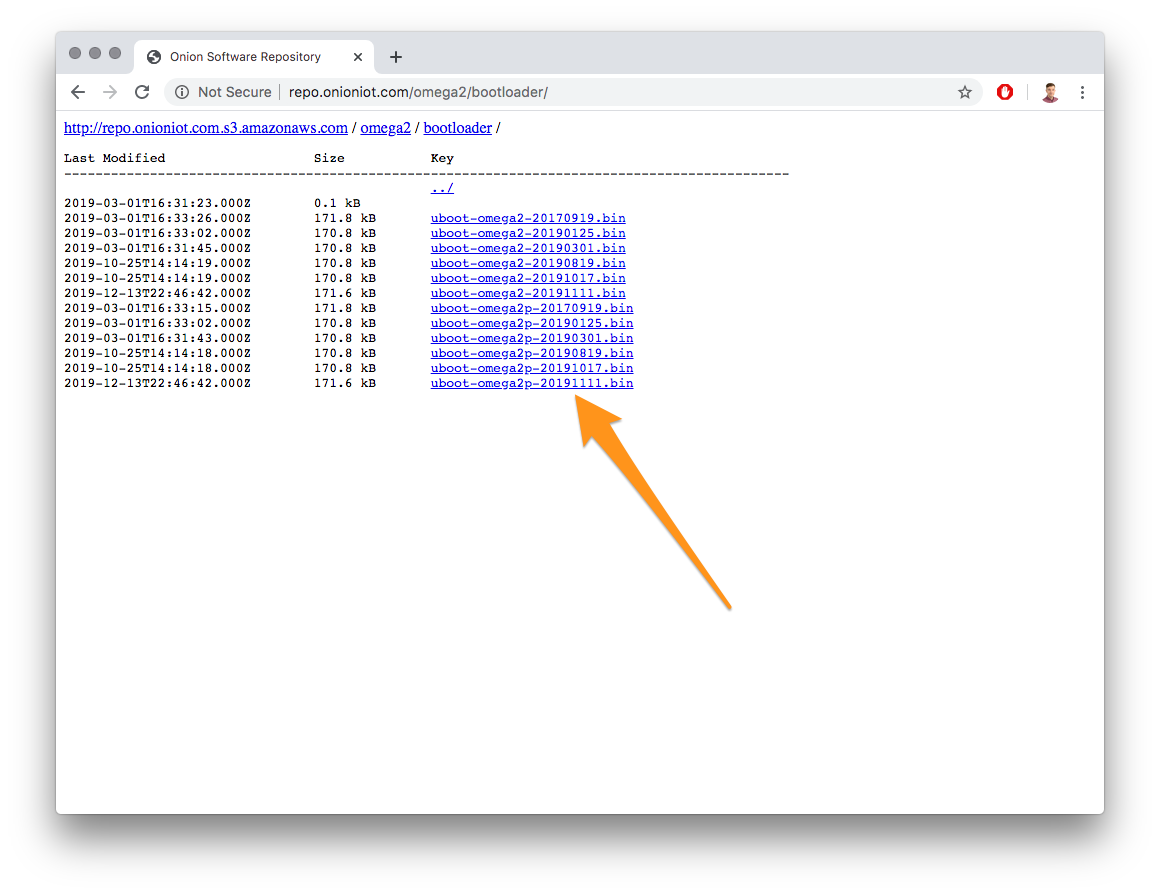
Open your web browser and go to the Onion Bootloader Repo: http://repo.onioniot.com/omega2/bootloader/
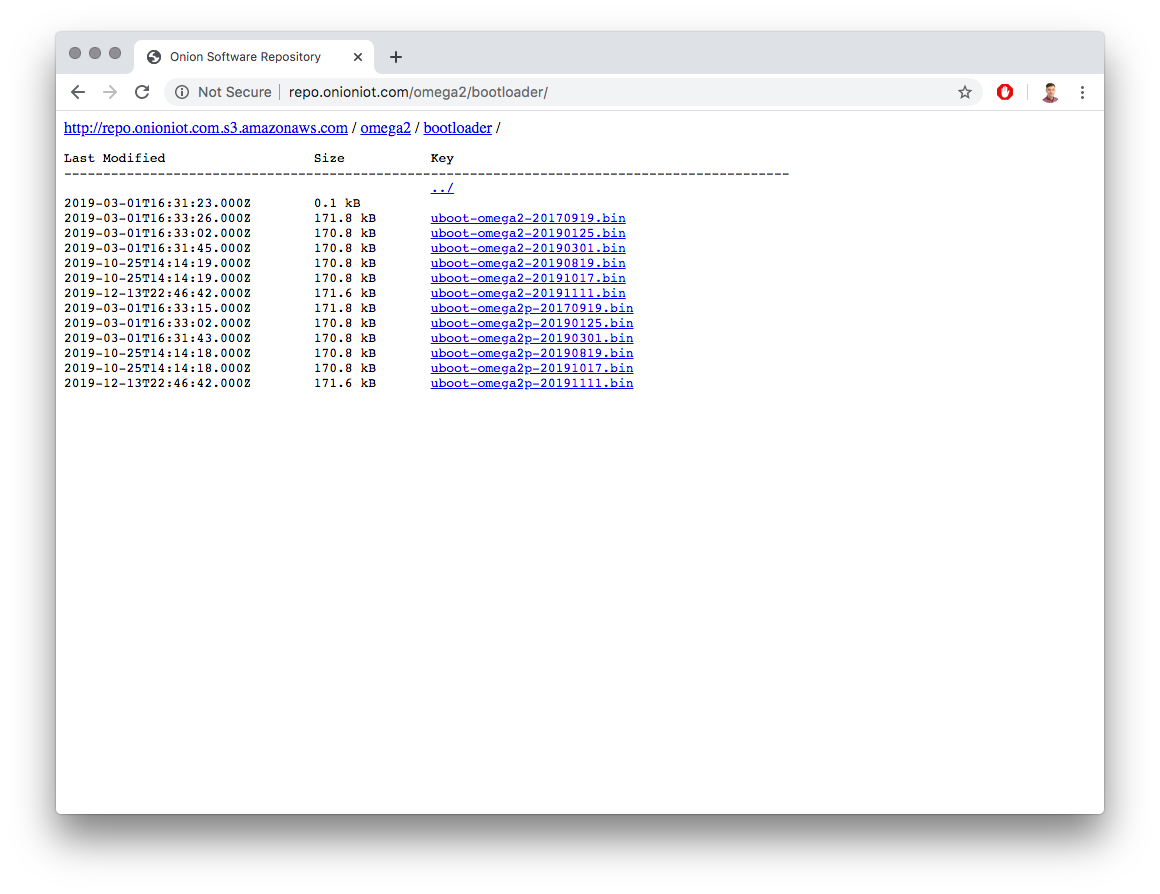
Make sure to select the correct bootloader for your device!
- If your device has 16 MB of internal flash and 64 MB of RAM, like the Omega2 or Omega2S, use the binary named
uboot-omega2-[DATE-CODE].bin - If your device has 32 MB of internal flash and 128 MB of RAM, like the Omega2+ or Omega2S+, use the binary named
uboot-omega2p-[DATE-CODE].bin
We recommend using the latest release of the bootloader. See the bootloader changelog for details of changes and improvements in each release.
Step 3: Configuring computer’s ethernet network
Next, configure your computer’s ethernet network to manually set its IP address to 192.168.8.100 and subnet mask to 255.255.255.0. By doing so, your computer will be able to communicate with the Omega over ethernet while it is in web recovery mode.
In Web Recovery Mode, the Omega’s ethernet port will have a self assigned
192.168.8.8IP address.
The following procedure outlines the instructions for Windows:
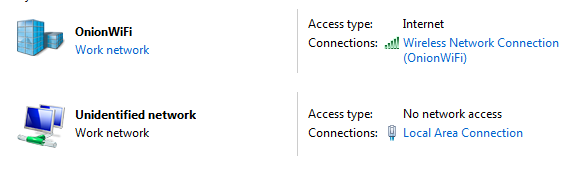
- You should notice a new device in the Network and Sharing center:
- We need to set up an IP address corresponded to our Omega’s ethernet settings. Click on
Local Area Connection, under the Undefined Network and selectProperties.
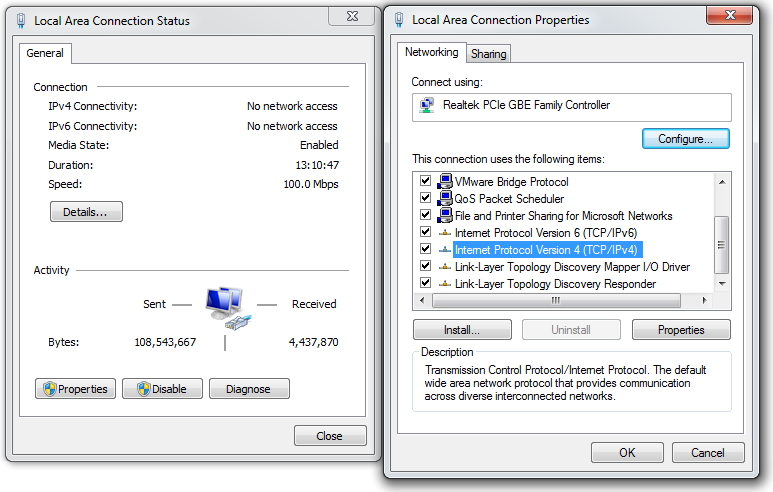
- Select
Internet Protocol Version 4 (TCP/IPv4)and clickProperties.
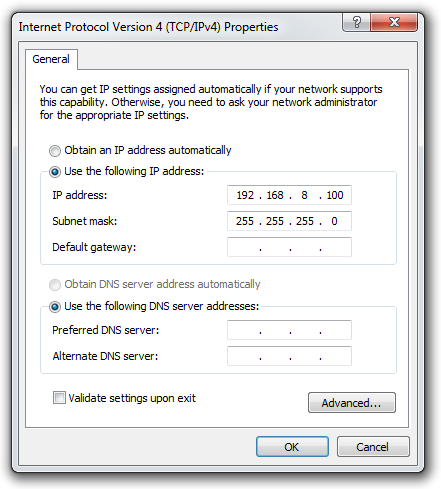
- Check
Use the following IP address:radio button and manually type192.168.8.100. Once finished, the subnet mask will be created automatically. ClickOk. Now you are all set.
Step 4: Activating Web Recovery Mode
Now, connect your Omega to your computer with the ethernet cable. But do not power on the device just yet!
First, connect to the Omega’s command line through serial. Then, power on the device and press the SW Reset button at the same time. This will get you to the bootloader and you’ll see the following menu:
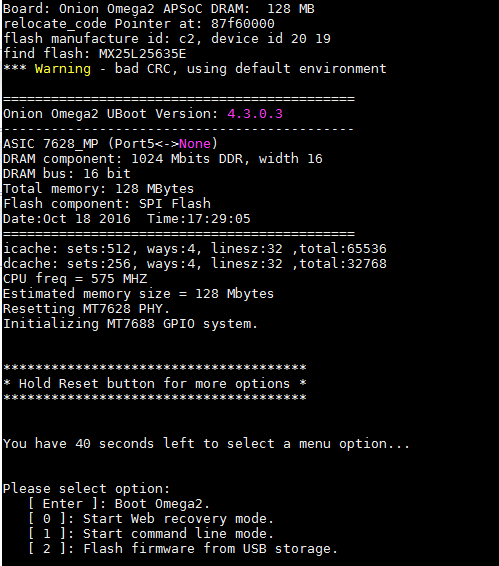
Note that the Reset button is connected to the active-high FW_RST/GPIO38 pin. To get to the bootloader prompt when using an Omega2S module, hold the SW_RST/GPIO38 pin at logical high while the device is booting. On the Omega2S Development Kit, this pin is connected to a button labelled WPS_RST.
We need to activate Web Recovery Mode by pressing 0. Be quick, you only have 40 seconds until the Omega reboots and tries to boot normally. After pressing 0, you should see the following output:
Bringing Eth0 (10/100-M) up...

RT2880 ETH setup done.

HTTP server starting at 192.168.8.8 ...

HTTP server is up and running.
Step 5: Flash the New Bootloader
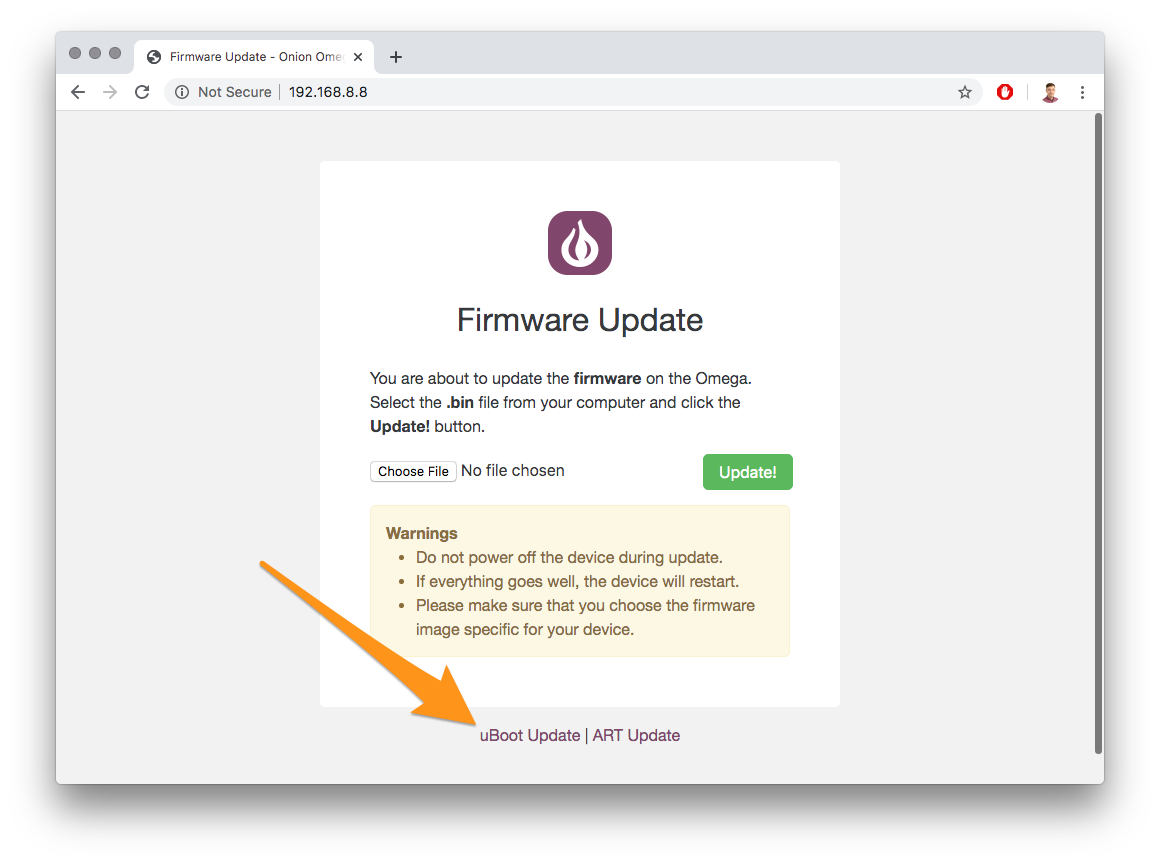
Open your Browser and type 192.168.8.8 in the search window. You will be presented with the firmware update page. Ignore that and click uBoot Update at the bottom
Now, we’ll be able to select the bootloader binary to be flashed on your Omega.
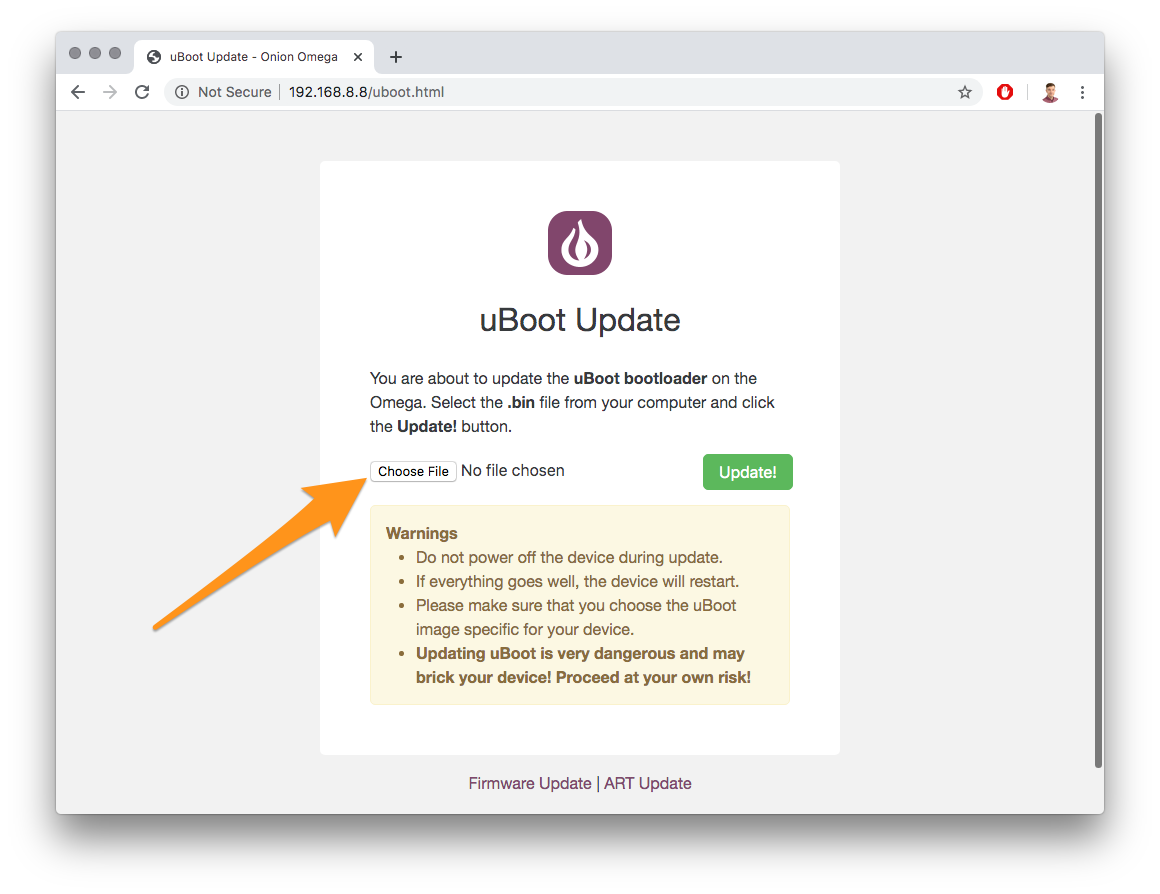
Use the form to select the binary downloaded in step 2:
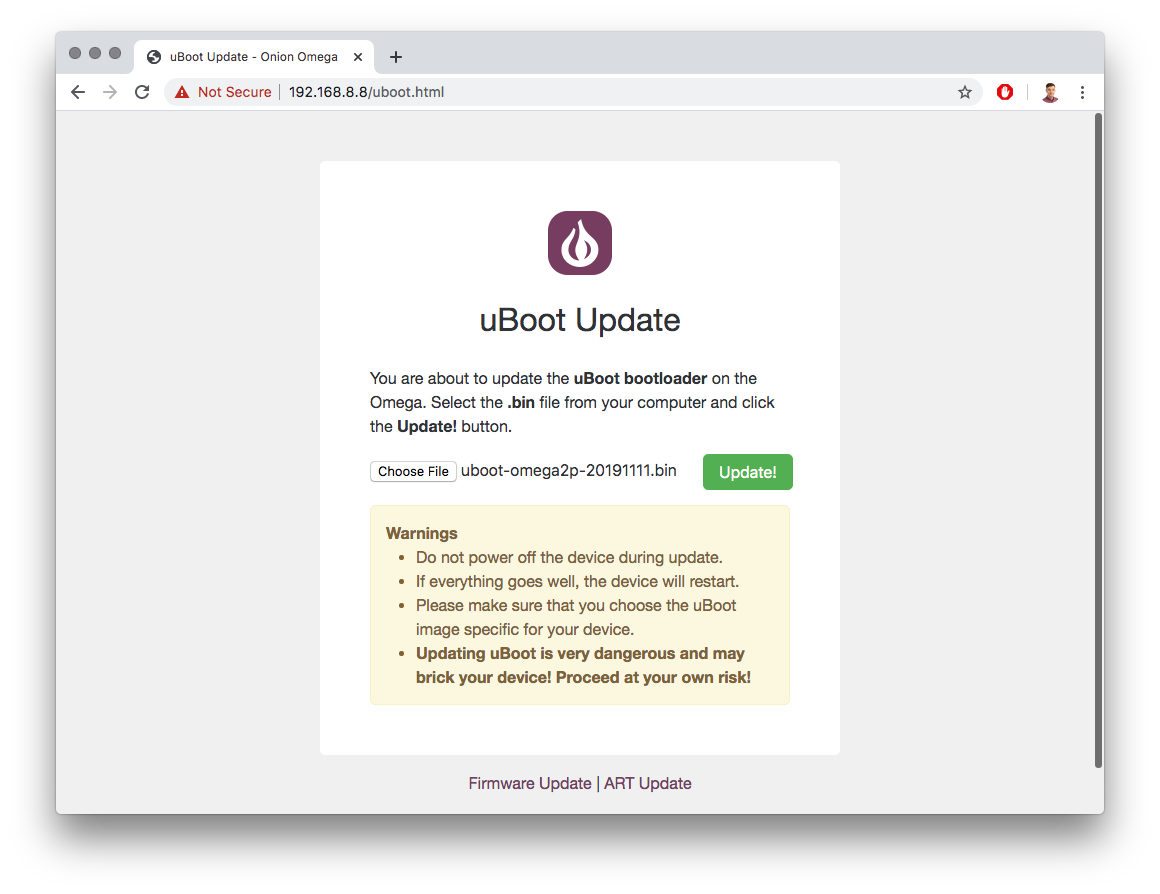
IMPORTANT: updating the bootloader is a potentially destructive action if the binary is corrupted or the bootloader has errors. Make sure you’re aware of the consequences before updating.
When you’re ready, hit the Update! button and you will see the Omega’s serial console output somethign like the following:
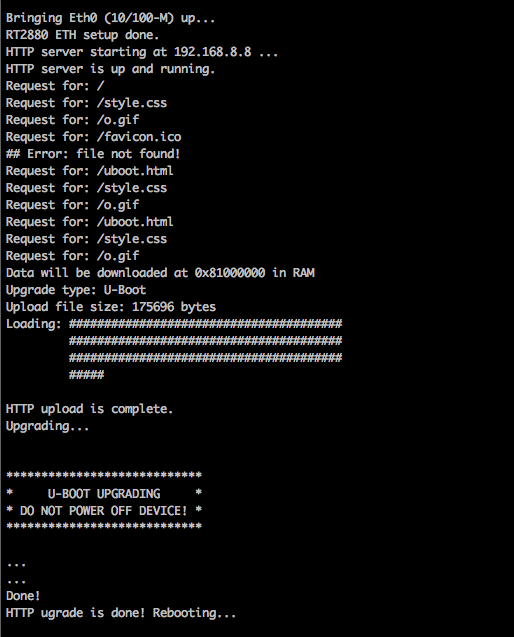
It will take about 10 seconds to flash the new bootloader to your device. Once this is done, the Omega will automatically reboot.
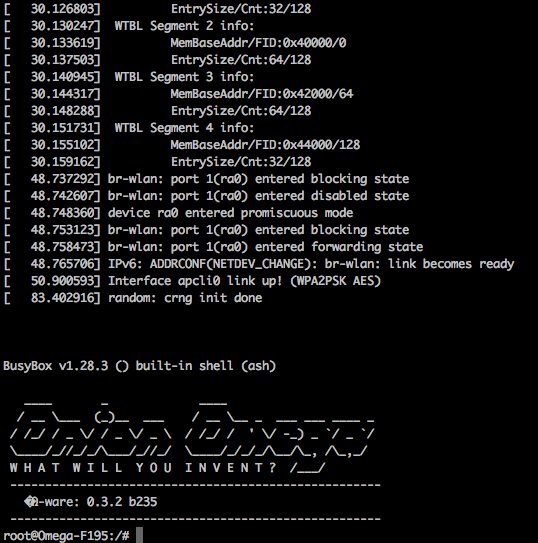
The Omega will boot normally if everything gone according to plan:
Checking your Bootloader Version
If you’re not sure which version of the bootloader your device is currently running, follow these instructions to find out. All you’ll need is access to the SW Reset pin and the serial console on UART0.
Reboot into the Bootloader Menu
Connect to the Omega’s command line through serial. Then, power on the device and press the SW Reset button at the same time. This will get you to the bootloader and you’ll see the following menu:

Note that the Reset button is connected to the active-high FW_RST/GPIO38 pin. To get to the bootloader prompt when using an Omega2S module, hold the SW_RST/GPIO38 pin at logical high while the device is booting. On the Omega2S Development Kit, this pin is connected to a button labelled WPS_RST.
Reading the Version Number
To read the bootloader version number, press 1 to Start command line mode.
The version number is indicated by the date shown at the top of the prompt:
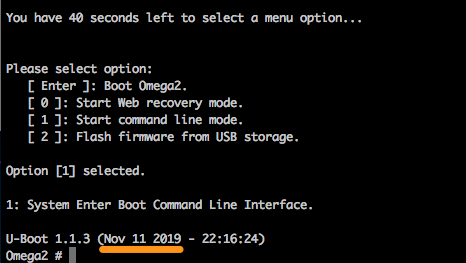
Notice how the date here, November 11, 2019 matches the date code on the binary: