Using a MicroSD Card
An SD card is a flash memory device that uses quantum tunneling effects to store information. Sort of like locking a piece of iron a secure glass box, and using a magnet to move it around to store information. The smallest version of the SD card available right now is the MicroSD format.
The Omega2 family has support for SD cards, with the through-hole Omega2+ featuring a built-in MicroSD slot. The surface-mount Omega2S and Omega2S+ expose SDIO pins that can be used to connect an SD card slot or eMMC storage. SD card support is enabled by default in the Omega’s operating system.
In this document, we’ll cover the SD pins on the OMega2S, how to insert an SD card in an Omega2+, how storage devices work in Linux, how to work with files on the card, and how to safely remove it without damaging your data.
The Omega2 family has an SDIO interface that supports one of eMMC, SD/Micro-SD, or other SDIO devices.
Which SD Cards are Supported
The Omega2 SDIO interface supports the SDXC specification for SD cards, with a maximum capacity of 2 TB and a maximum transfer speed of 300 MB/s, and the eMMC5.1 interface for eMMC storage.
Omega2S SD Pins
The Omega2S module exposes the SDIO pins:
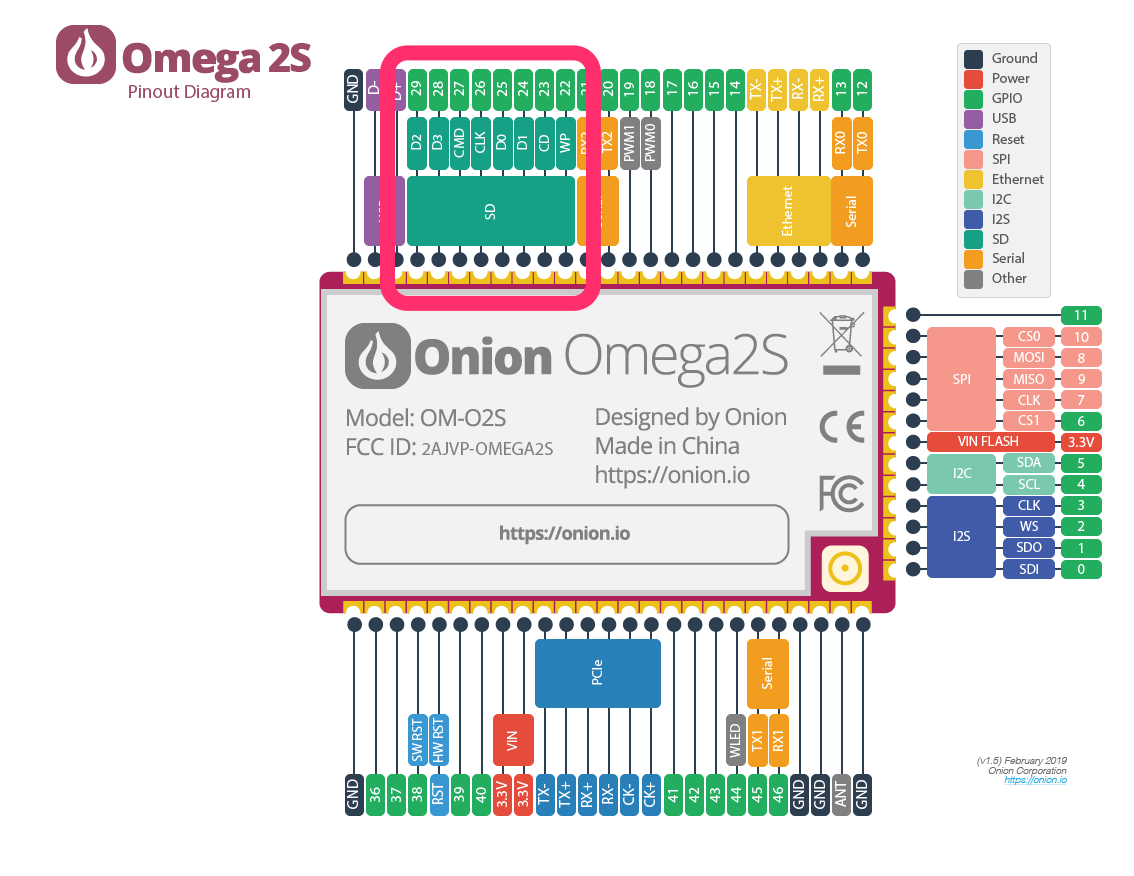
When designing custom hardware with the Omega2S, designers can connect these pins to an SD card slot. See the Omega2S reference design for more details.
Recommended Micro SD card connector: Molex 5033981892 – we’ve had good results with it on our devices.
Inserting a MicroSD Card into the Omega2+
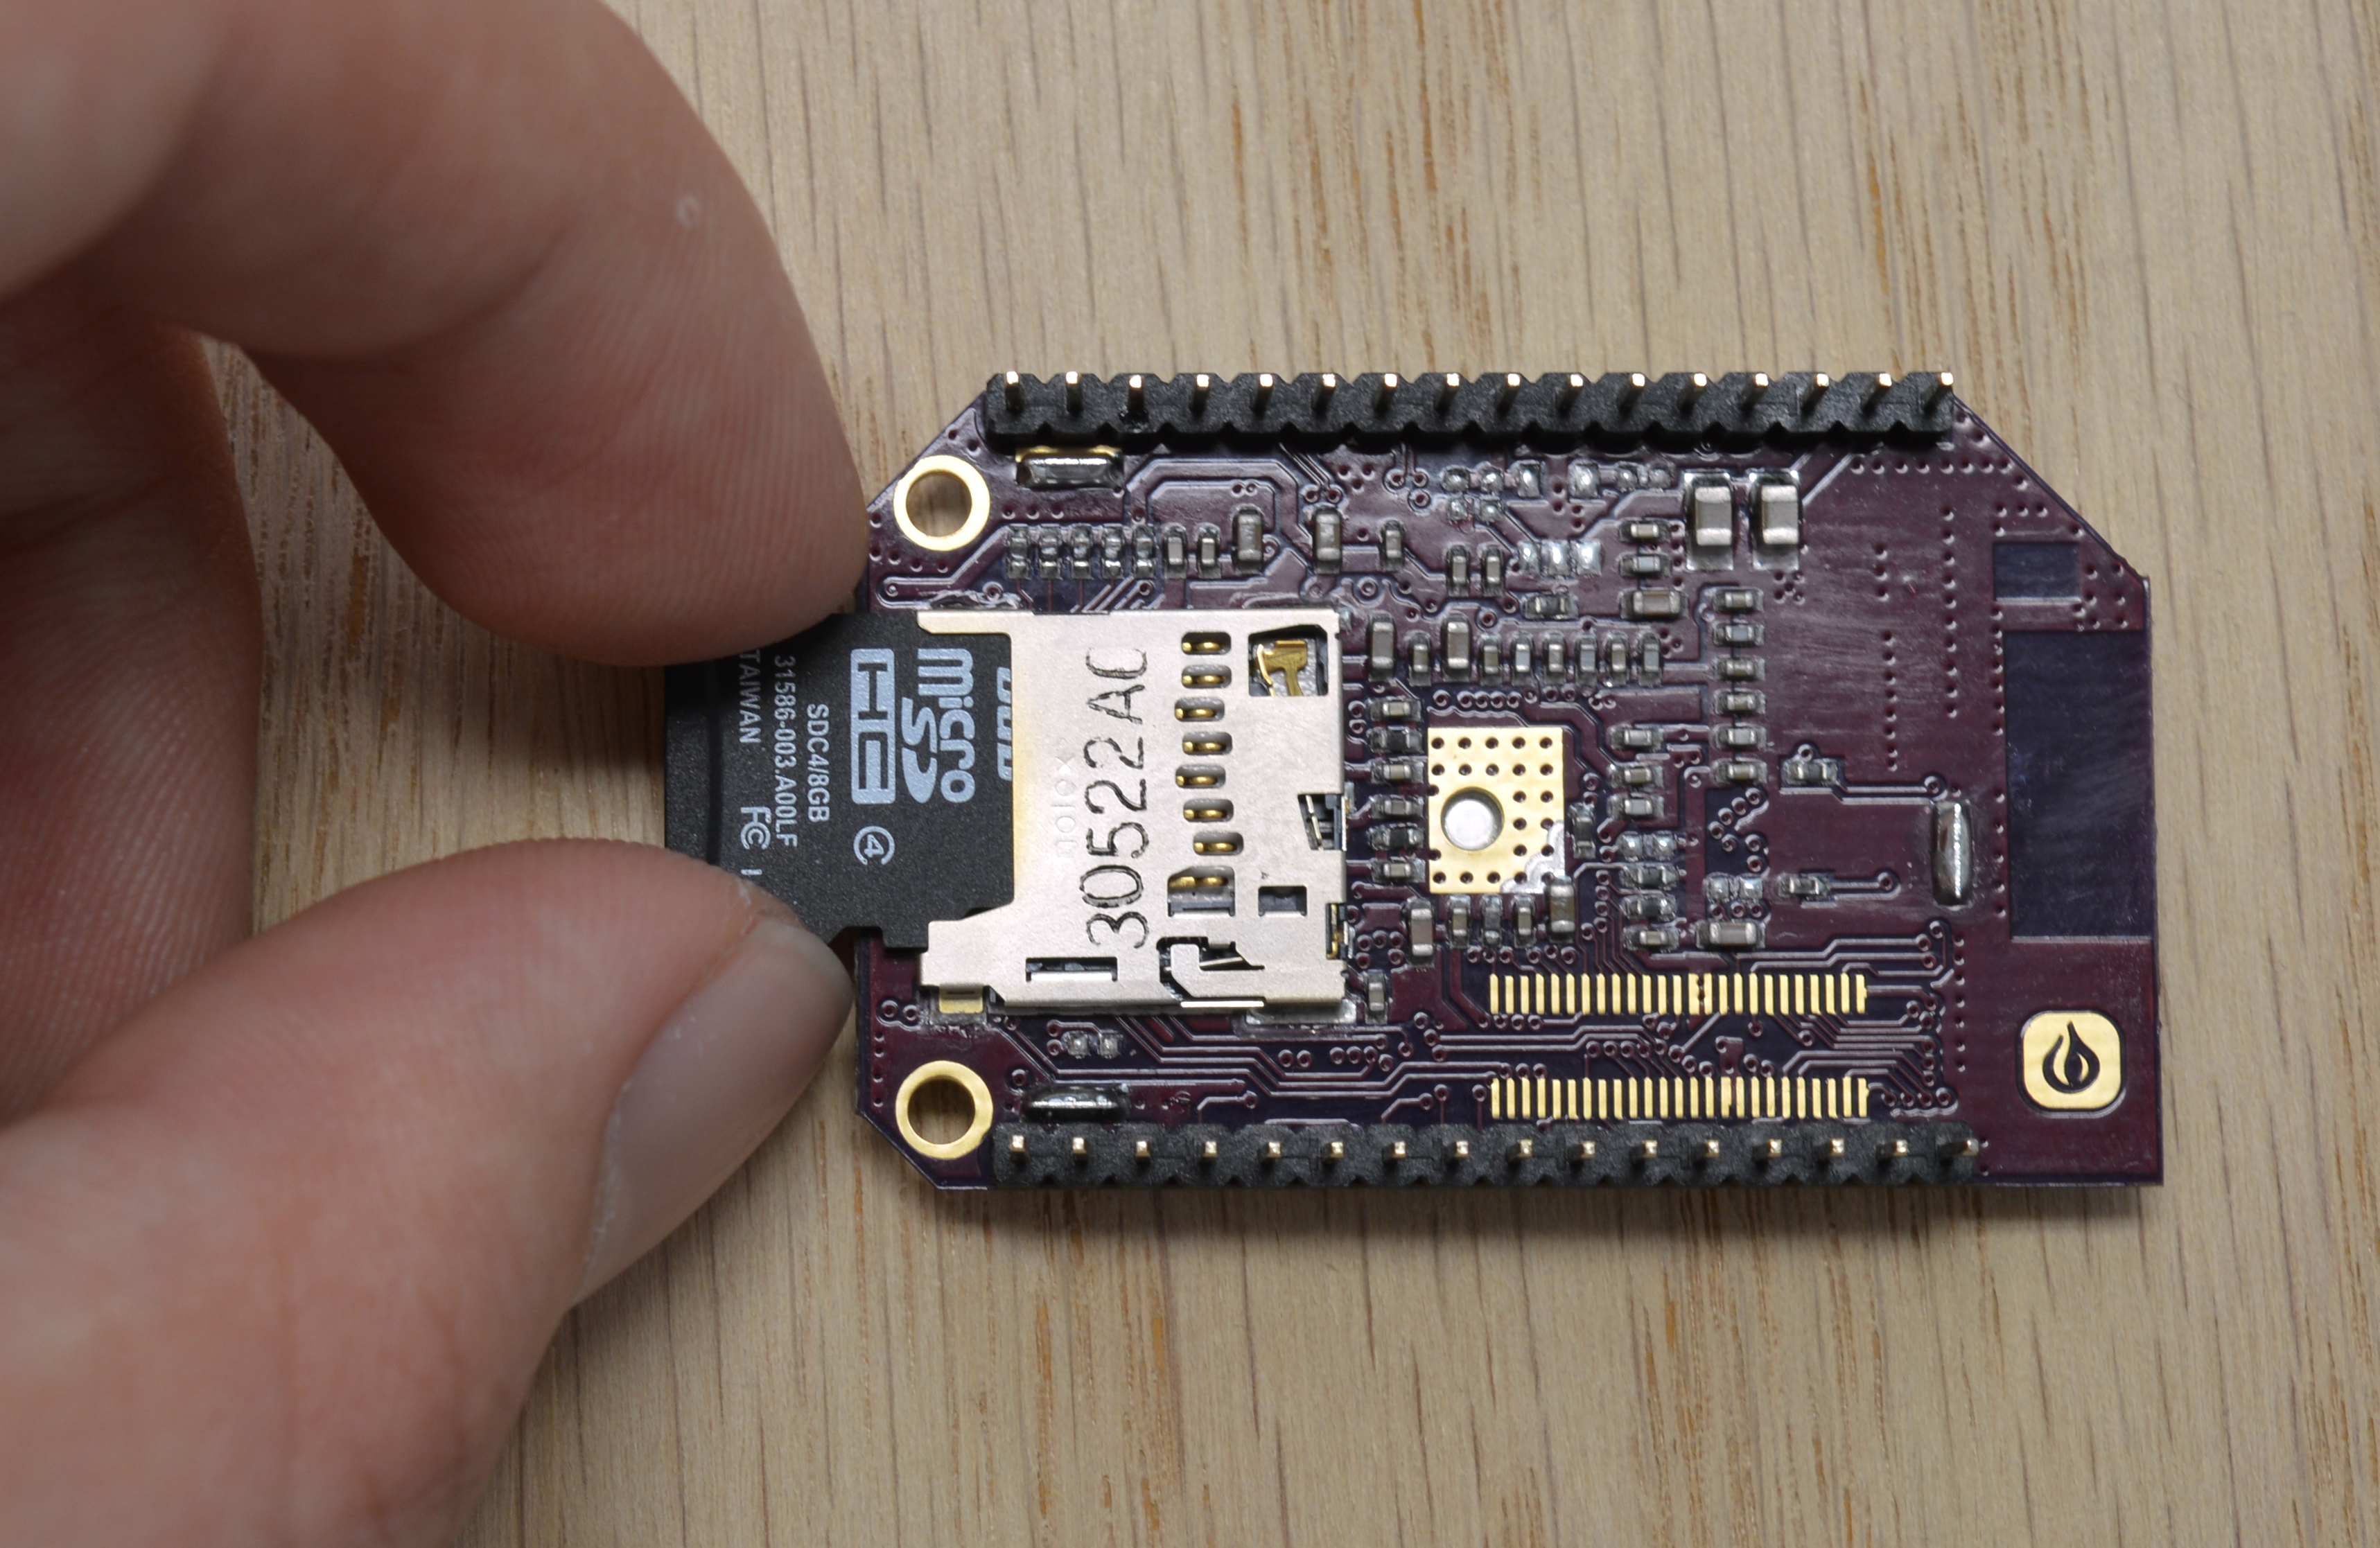
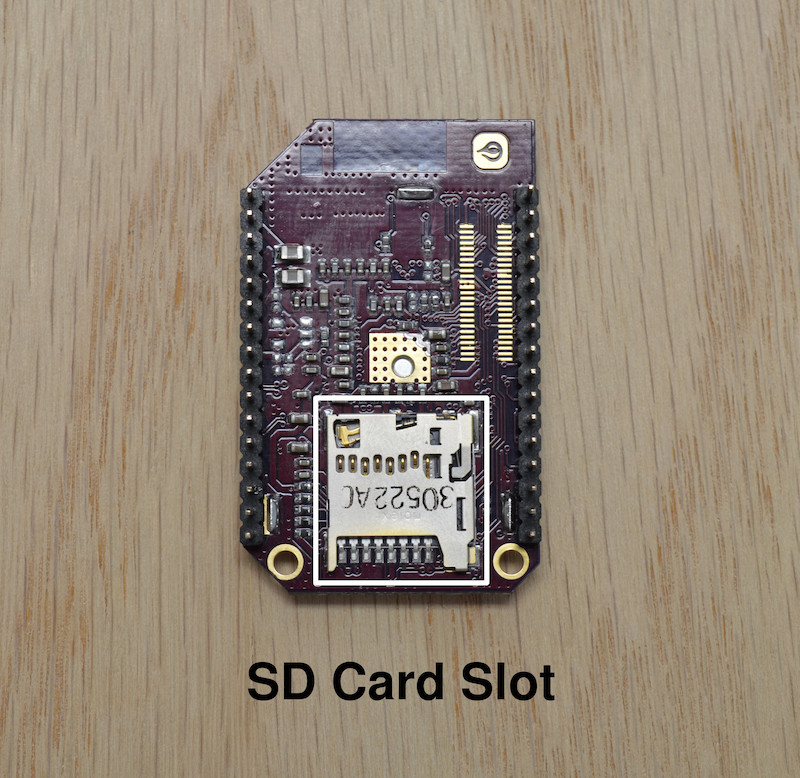
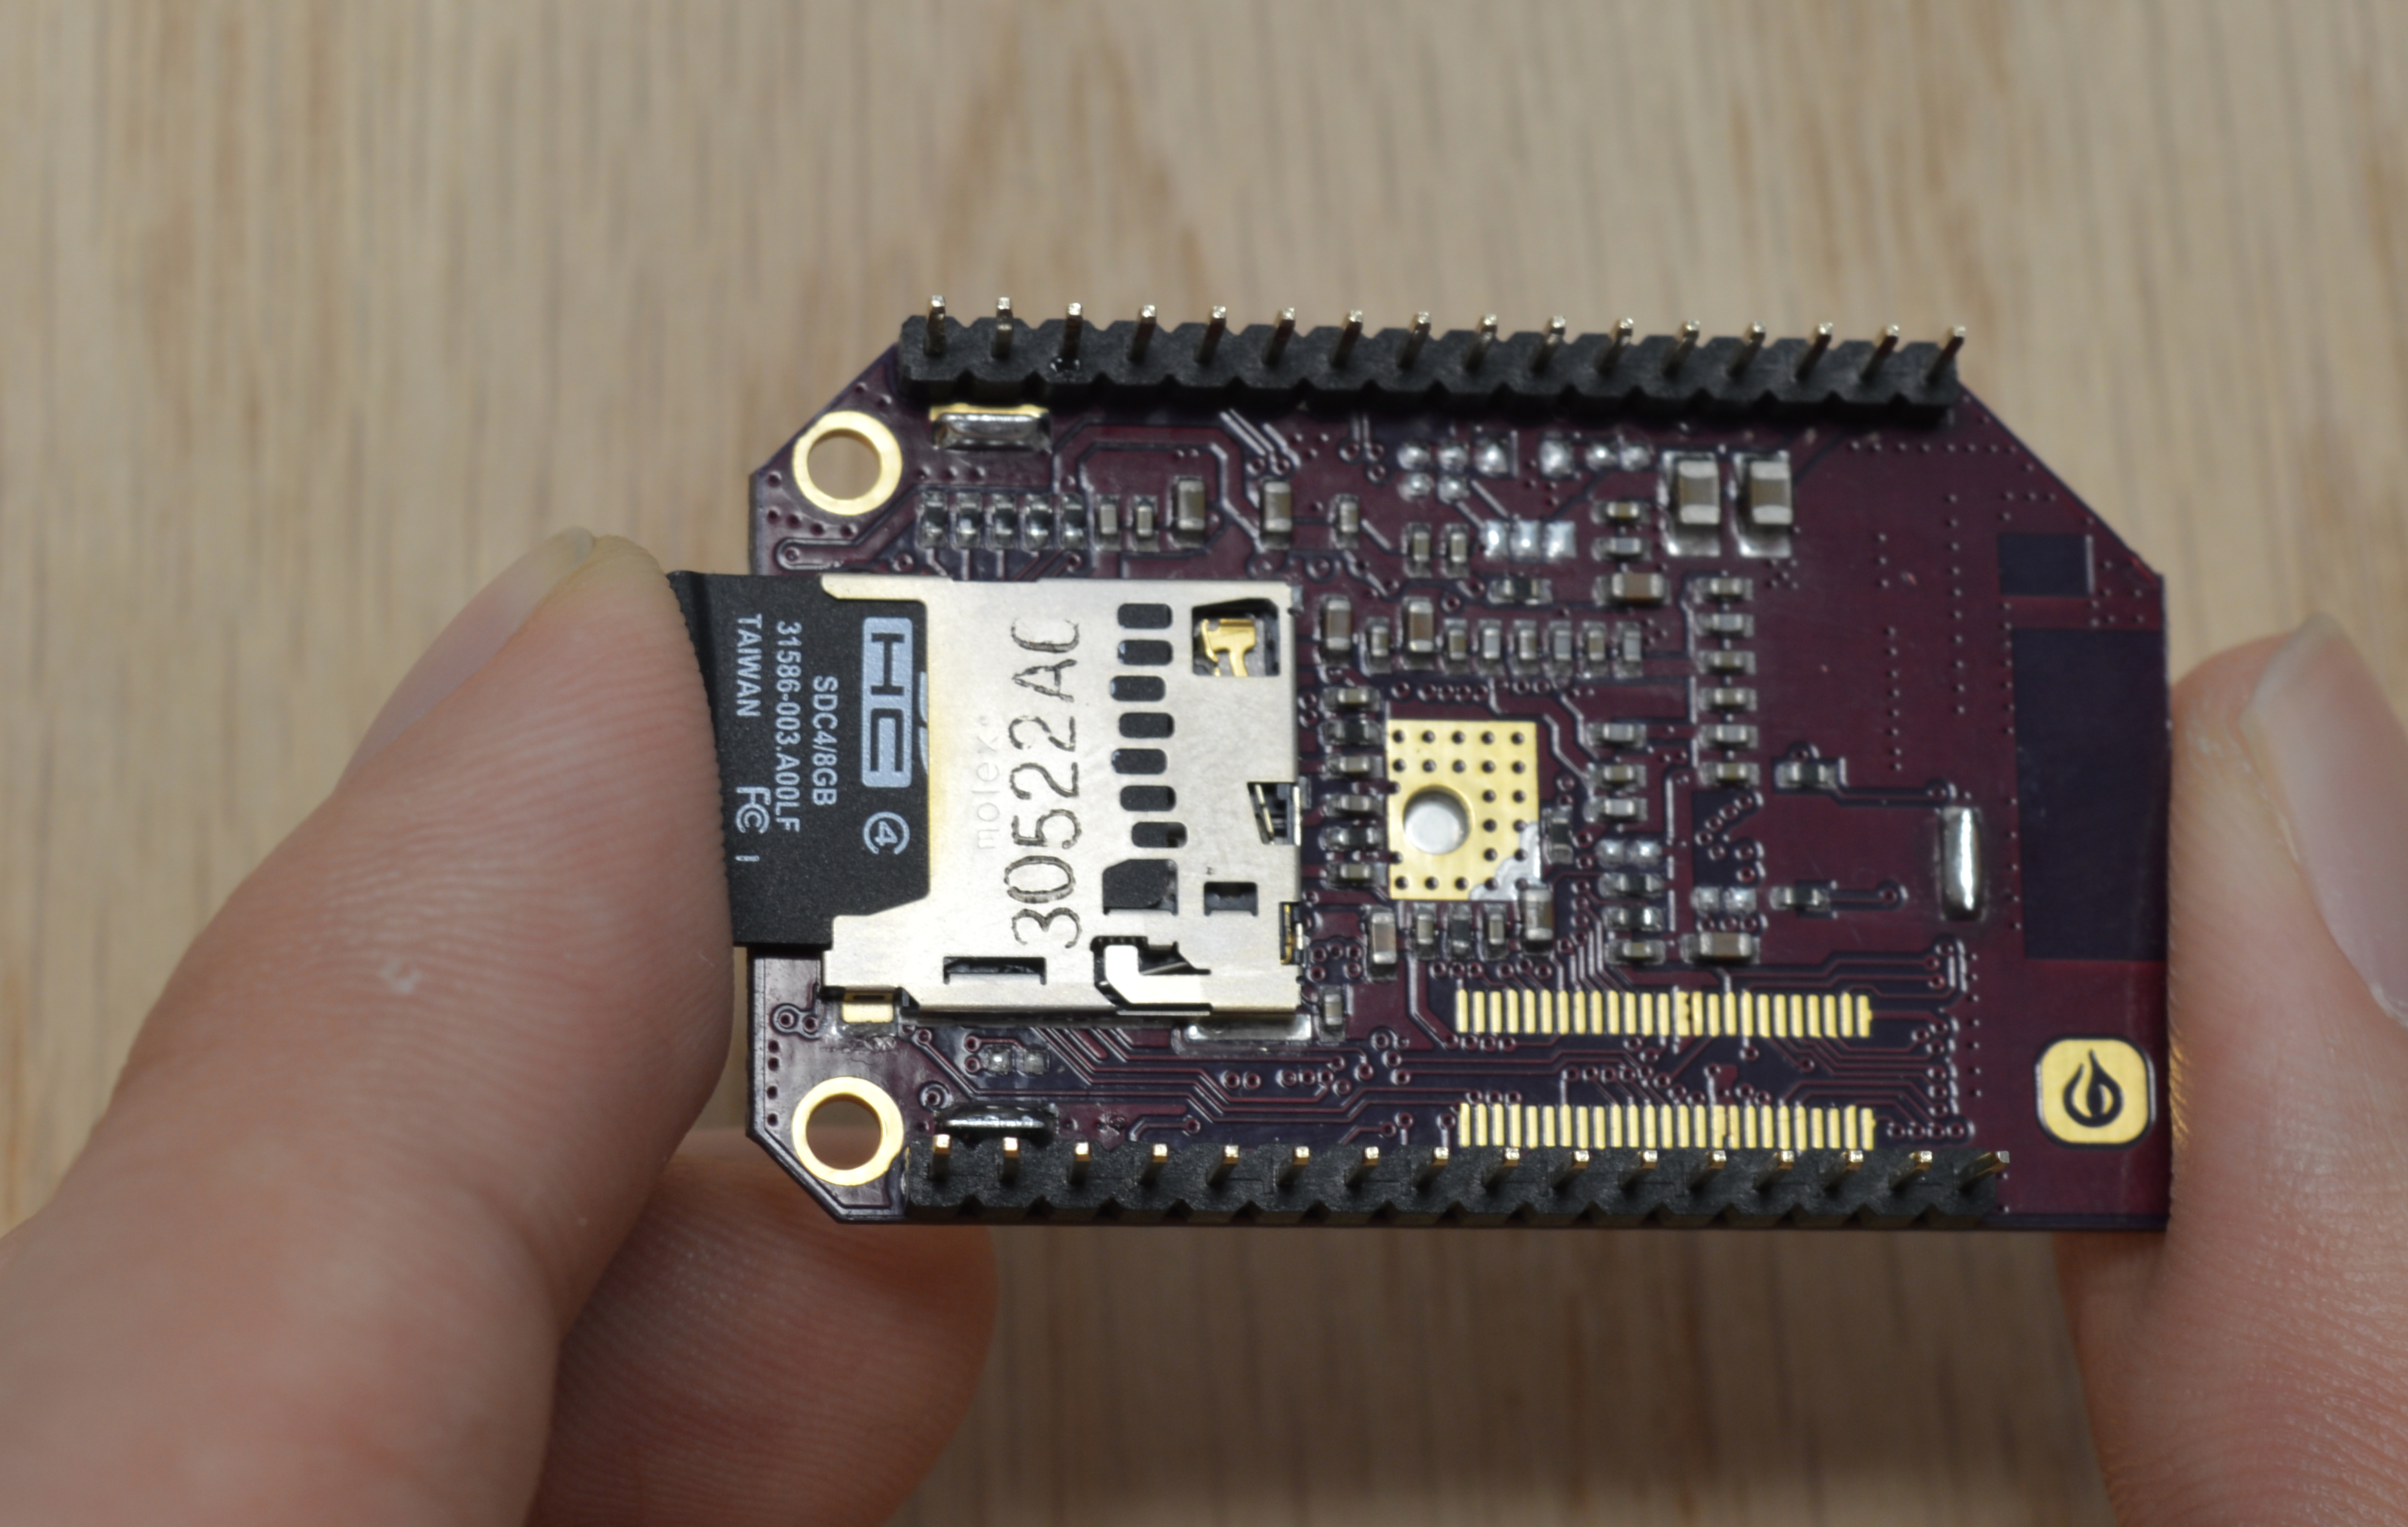
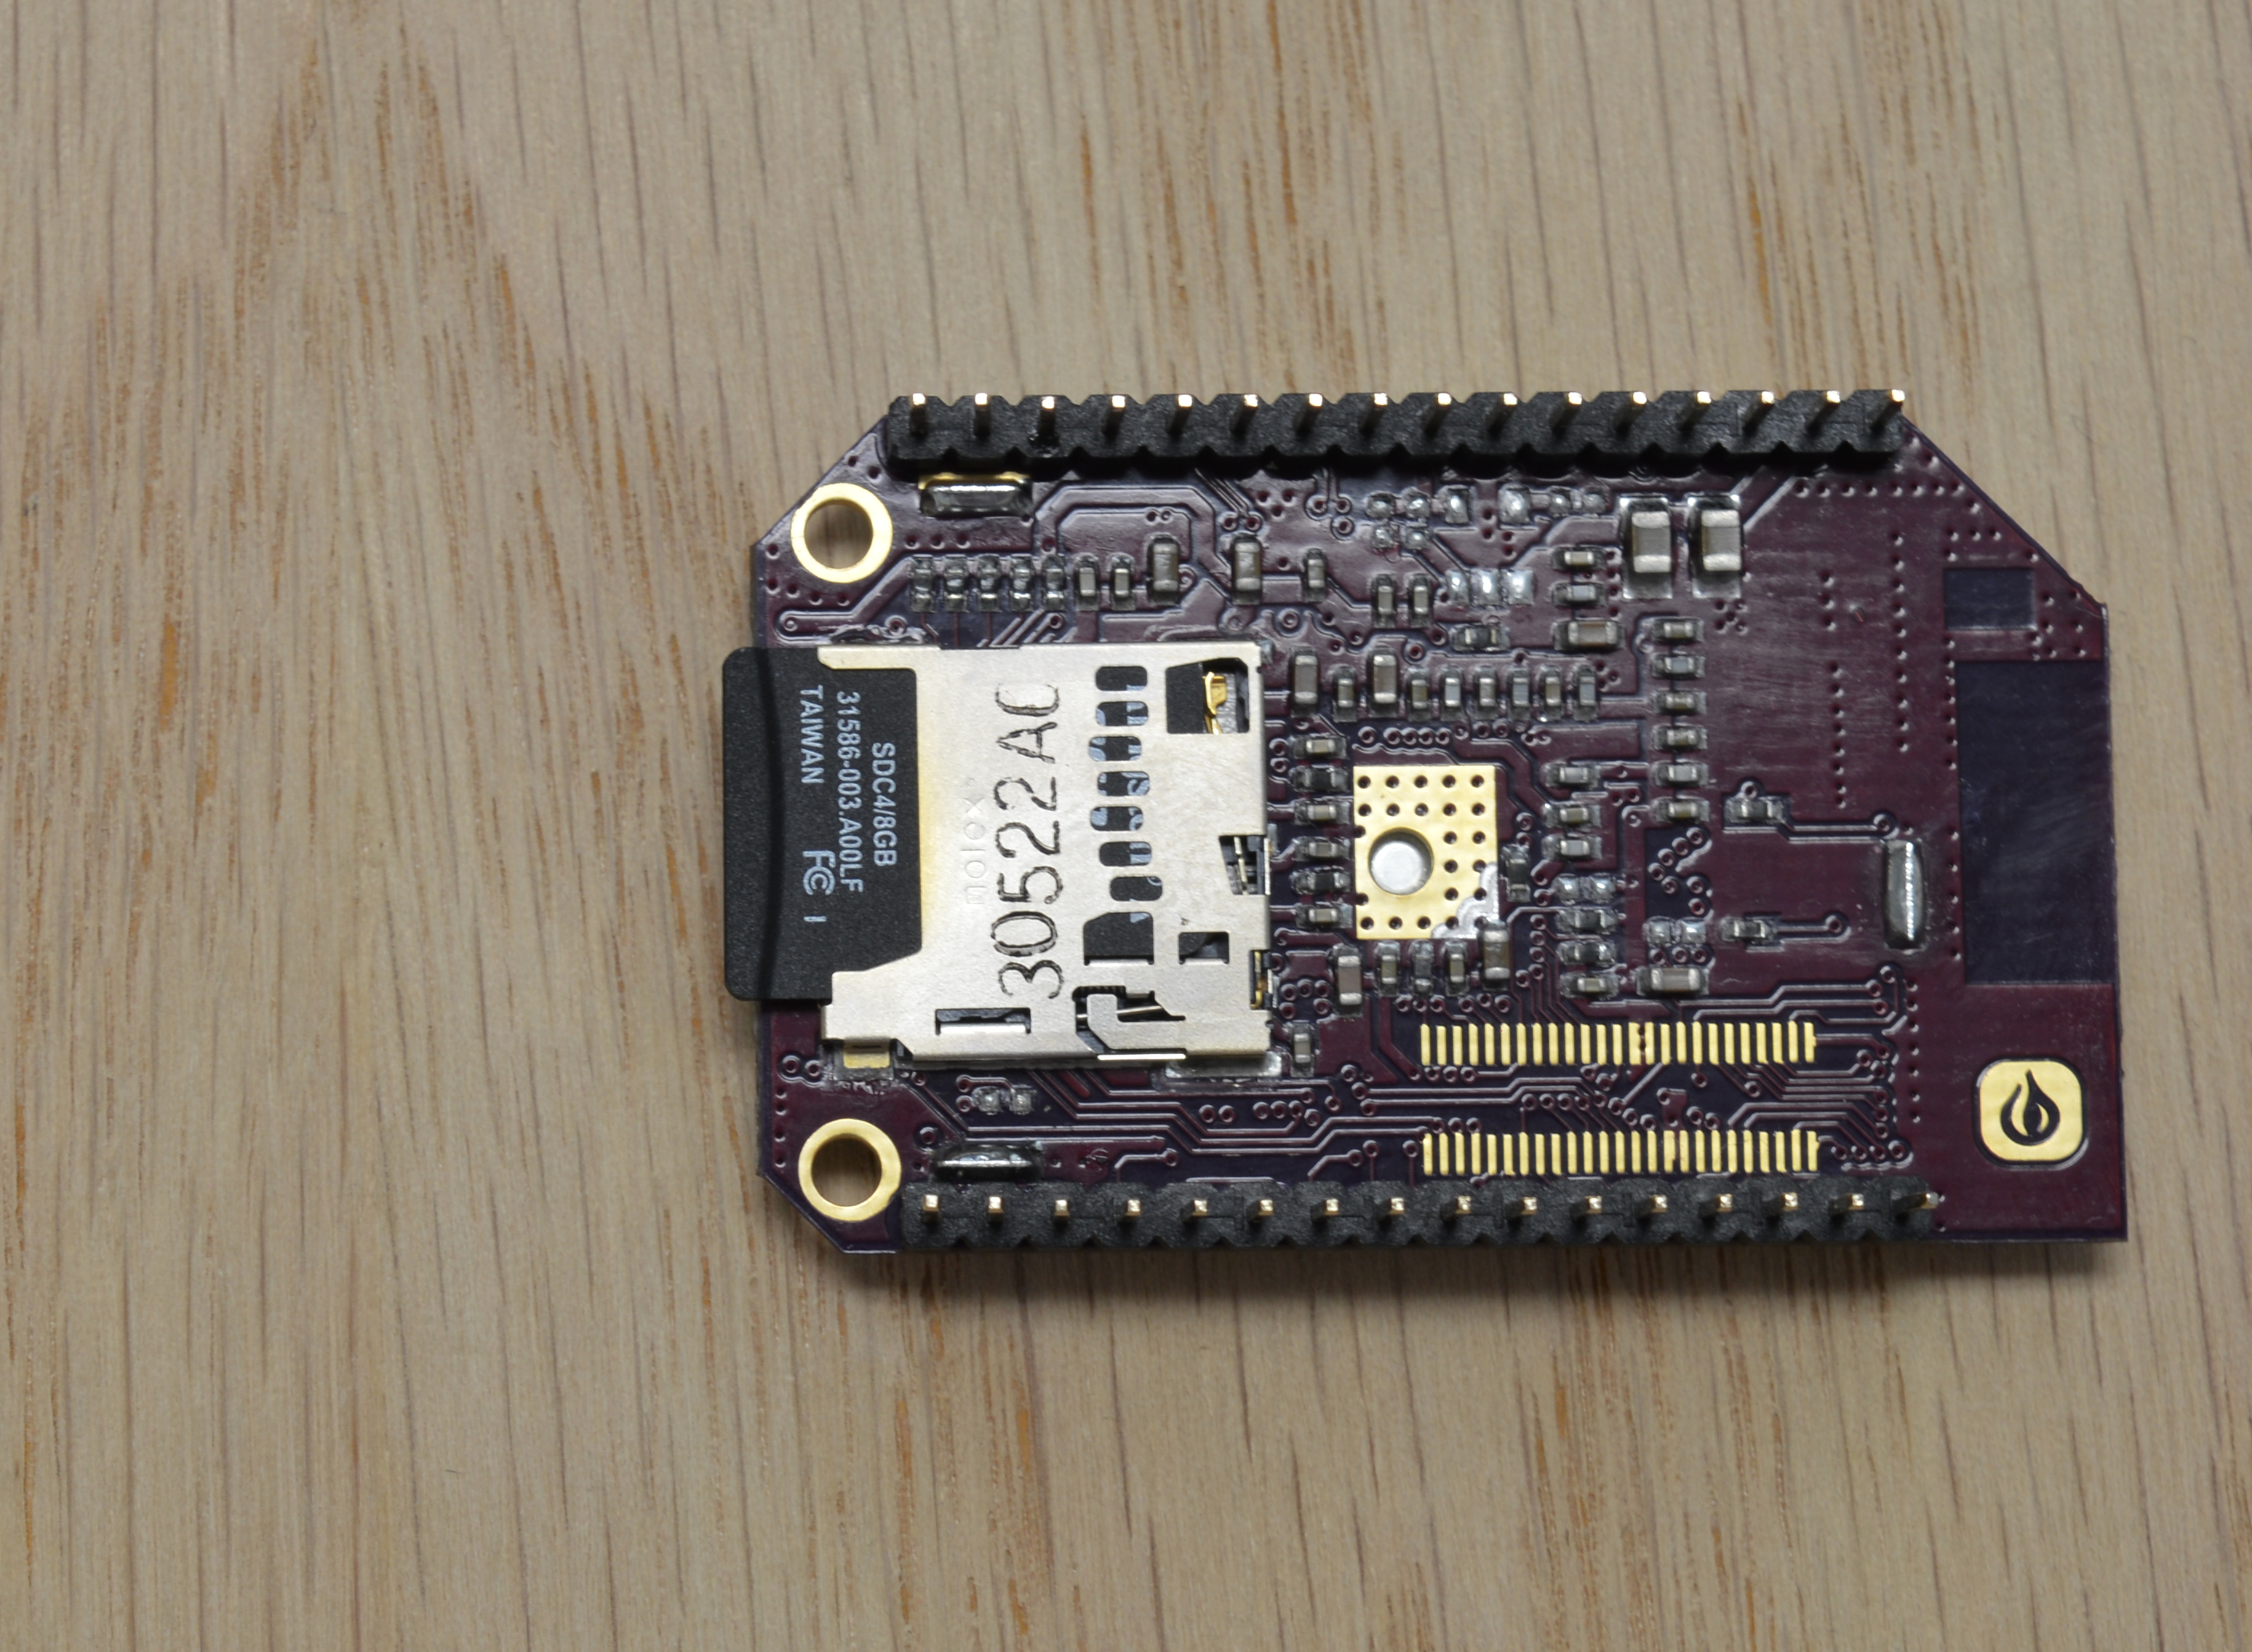
The Omega2+ module comes with a MicroSD card slot, enabling you to greatly expand the storage capacity of the Omega without much added cost. The MicroSD card slot on the Omega2+ can be found at the bottom of the board in between the two rows of pins.
The Omega2+ supports MicroSD card on firmware builds b143 and higher. Don’t forget to upgrade your firmware.
The MicroSD slot is spring loaded, and it will remain in place once it’s locked in. to properly seat it,
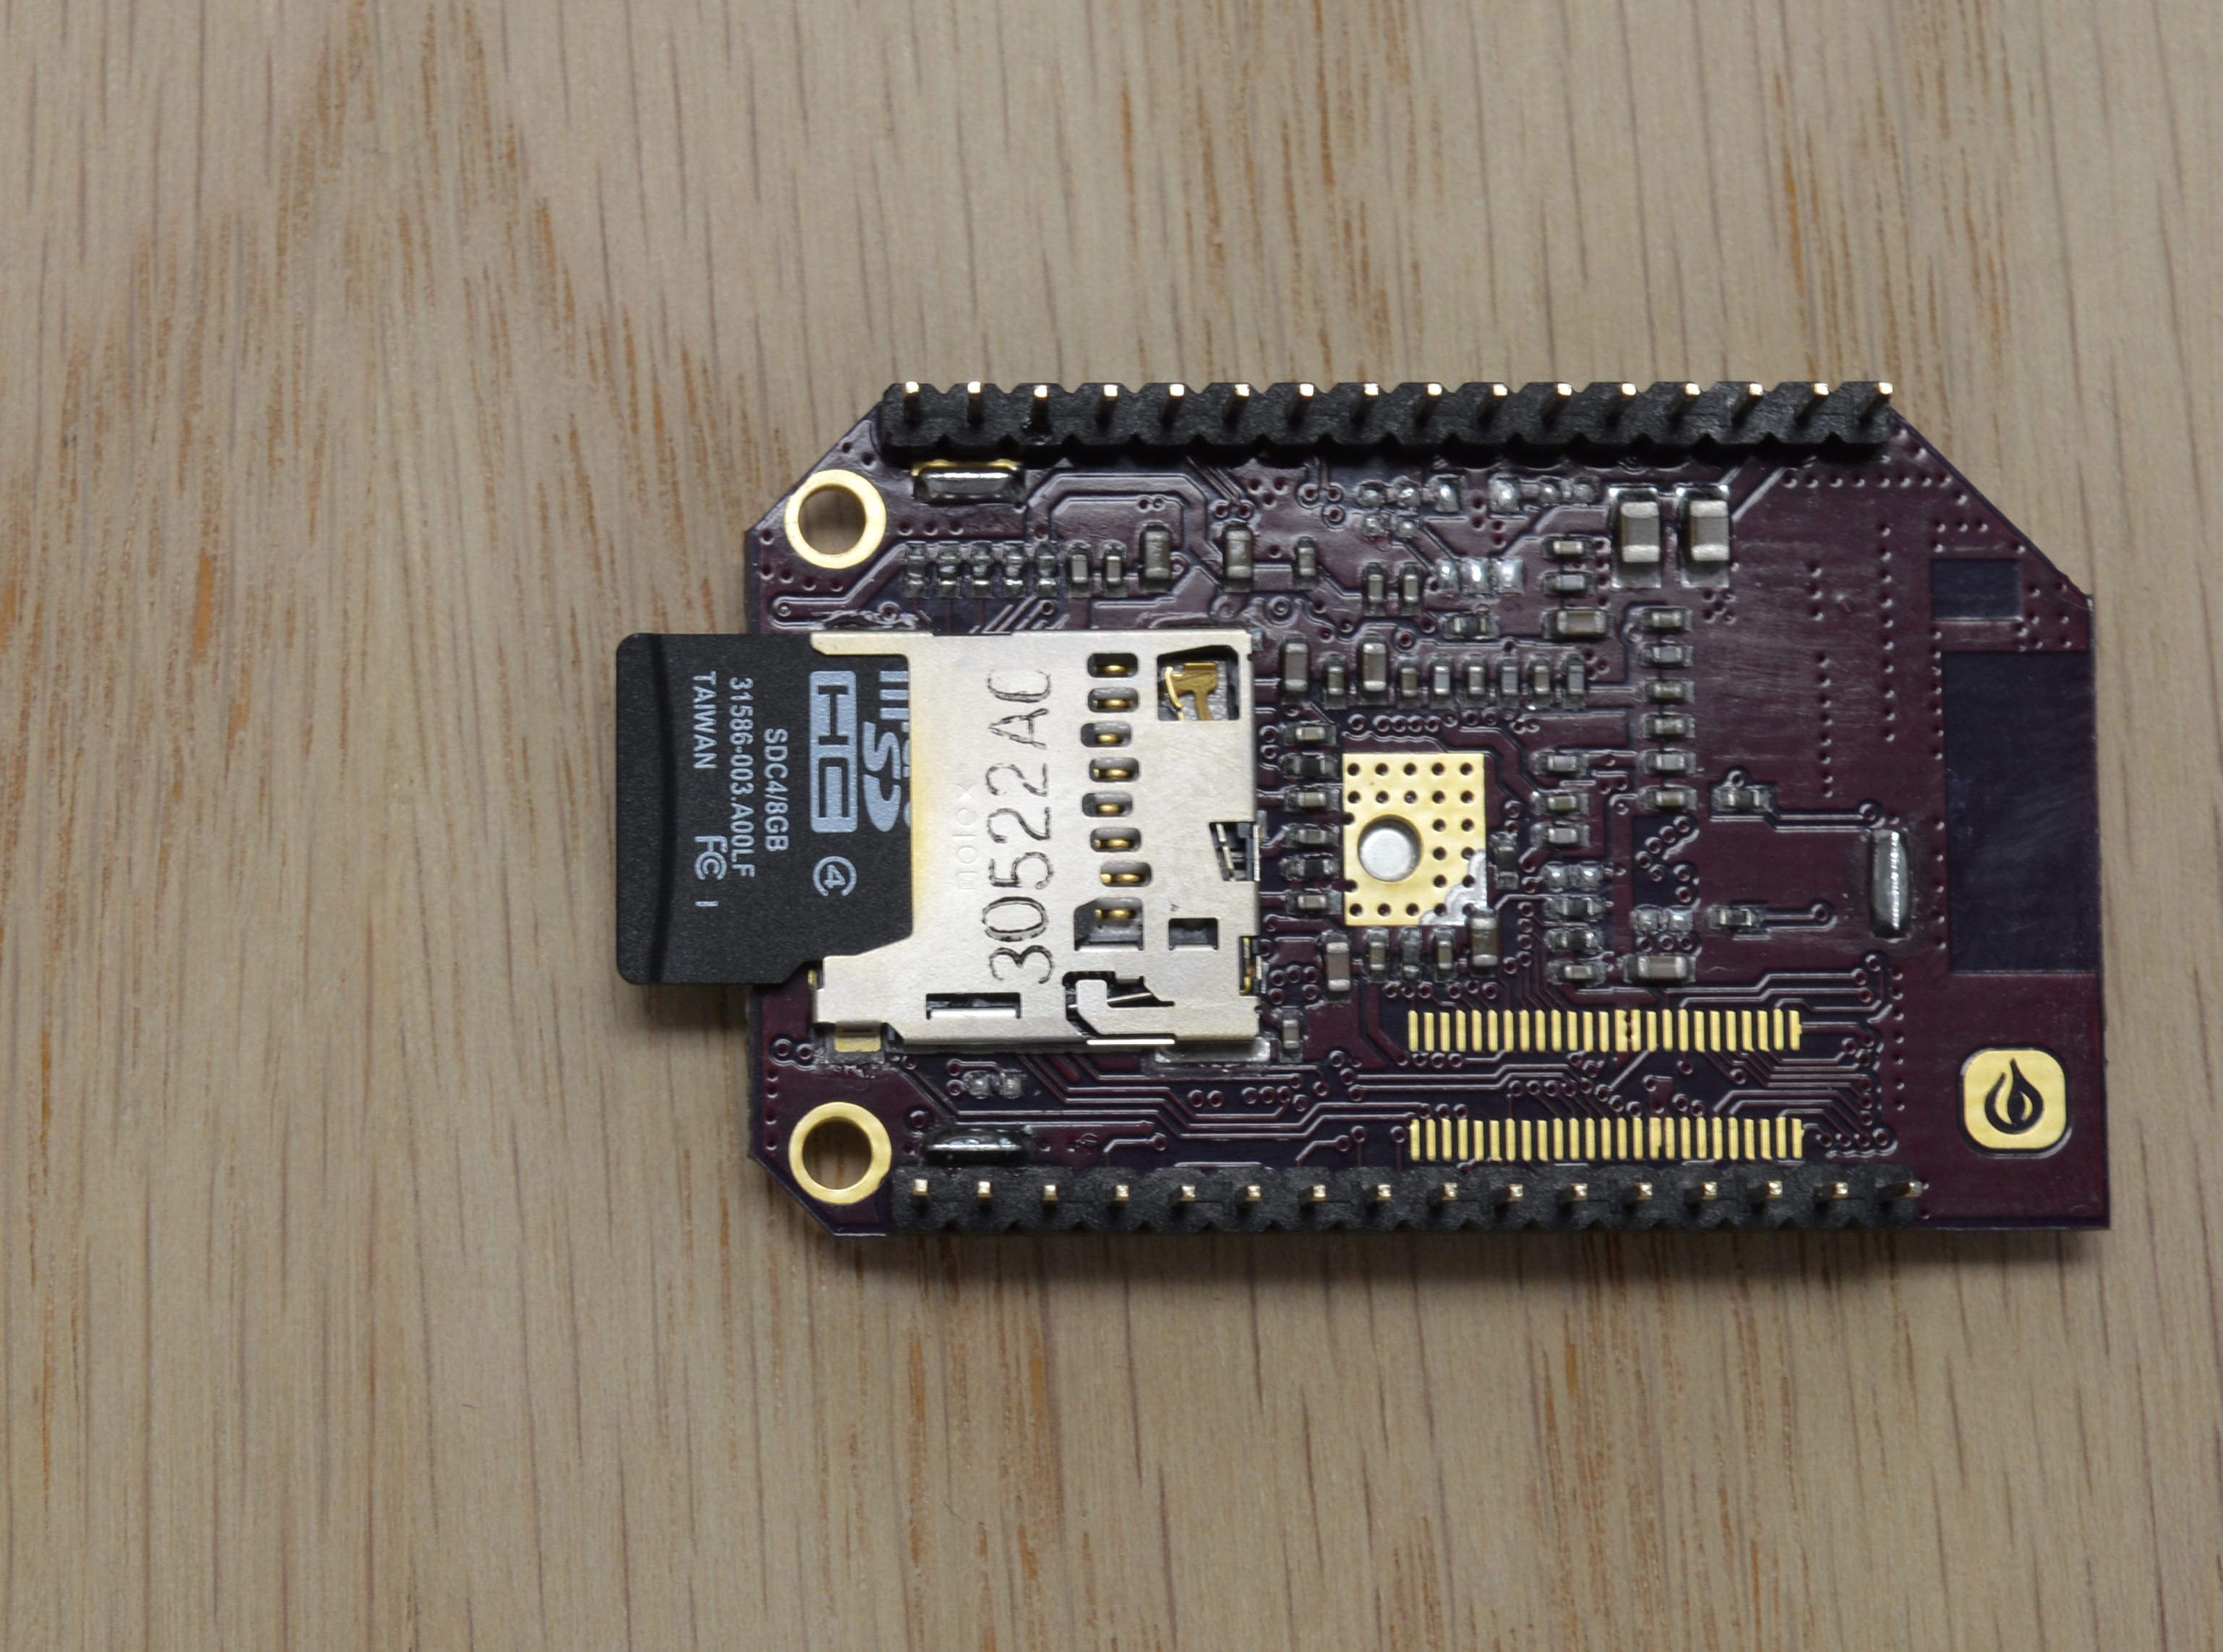
To insert the MicroSD card, you should firmly push the SD card into the slot until you hear and feel a click.
This is what it should look like once seated properly -
After you insert the card, you should make sure it’s mounted in the filesystem and accessible.
Occasionally, the spring mechanism may be already preloaded and your card will pop right back out if you let go. Simply pushed it back in until the click, and you should be all set.
If you’re running the latest firmware, the Omega should have automatically mounted the MicroSD card already.
Storage Devices and Linux
On a Linux device, a storage device needs to be mounted in order to access the data. Mounting a device maps its storage space to a directory on your device so that you may access it.
The Omega2 comes ready with an auto-mounting tool that will take care of that process for you!
The default mount location is /mnt/.
On firmware older than
v0.3.0, the default mount location was/tmp/mounts/and themountdpackage controlled automatic mounting. Firmwaresv0.3.0and up use theblock-mountpackage.
Accessing the MicroSD Card
Under normal circumstances, the SD card and any USB device you plugged in should be automatically mounted to the /mnt directory. You can check there with ls /mnt/ to determine the name the Omega assigned the card. Running ls /mnt gave us mmcblk0p1 as the assigned name of our MicroSD card.
Once mounted, it acts as a regular directory or folder in all ways, and any file that you stored in the card originally should be there! For us, it looked something like this:
root@Omega-1234:~# cd /mnt
root@Omega-1234:/mnt# ls
mmcblk0p1
The
p1in the name means partition number 1 of the MicroSD card, if you have partitioned your MicroSD, they should show up asmmcblk0p1,mmcblk0p2, and so on.
If you’d like to change where the MicroSD card is mounted on the filesystem, we’ve written a guide covering how to do so for both MicroSD cards and USB drives.
Safely Removing a MicroSD Card
To safely remove your SD card you should always unmount it first. This will eliminate the possibility of the data being accessed while you physically remove it, which can corrupt the SD card’s data and filesystem.
The umount command is used to unmount the storage.
umount <mount point>From the above example:
umount /mnt/mmcblk0p1Note: not
unmount! We’ve made this mistake more than once!
Now that the card is no longer being used by the Omega, we can physically remove it without risking corruption.
Removing a MicroSD Card on the Omega2+
After unmounting the SD card from the filesystem, the MicroSD card can be safely removed:
Just push until it clicks.
Now you can pull it out of the slot - careful not to lose it!