The Omega as a Router
This tutorial will show you how you can use the Omega as a WiFi router. A router is a device has a connection to the internet (or other networks) through Ethernet, and then provides access to this network wirelessly through a WiFi Access Point (AP).
The Omega is configured to host a WiFi Access point by default, by following this tutorial, you will learn how to change the configuration so that network access from the ethernet port is shared on the WiFi AP.
In this example, we will be using an Omega2, a Dock, and an Ethernet Expansion to turn our Omega into a low-cost yet effective router. These same configuration changes can be made for any custom hardware that uses the Omega2/Omega2S and has an ethernet port.
Overview
| Tutorial Difficulty | Intermediate |
|---|---|
| Time Required | 10 mins |
| Required Materials | Omega2 or Omega2+ Expansion Dock Ethernet Expansion |
We’re going to first setup the hardware, then we’ll change some Omega config files that will enable the Omega to forward our connection properly.
Step 1: Setup the Hardware
Connect your Ethernet Expansion to the Expansion dock, and plug in the Ethernet cable, as shown below:
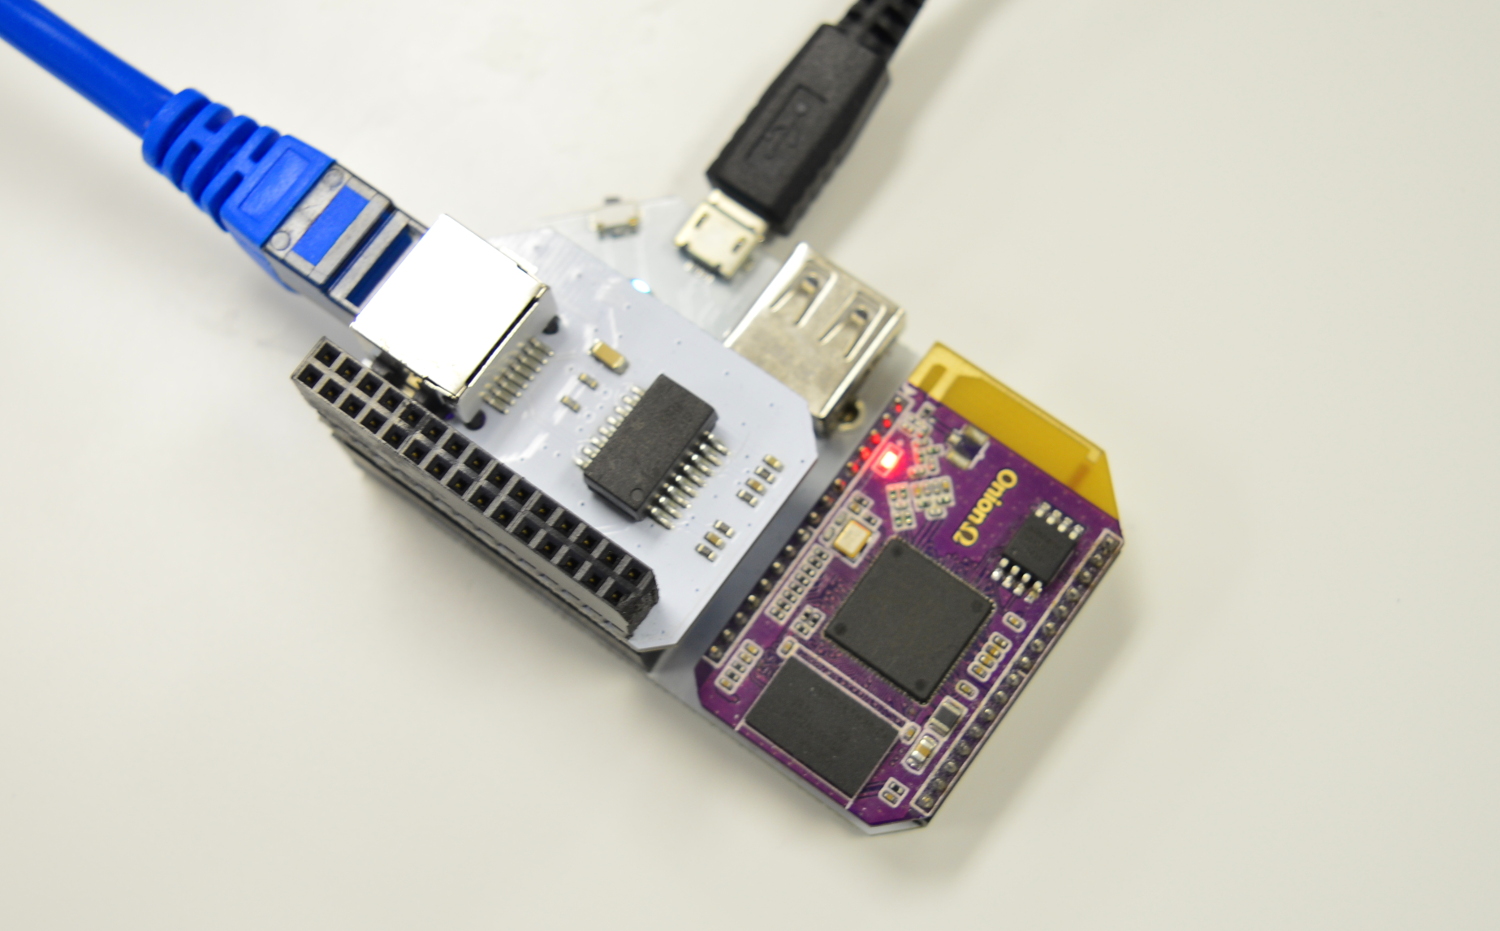
After you have connected everything, power on the Omega.
Step 2: Setup the Omega
The next step is to disable the WiFi client connection on the Omega. We want our Omega to connect to the internet via the ethernet connection and so we’re going to turn off the WiFi on our Omega
We’re going to be disabling the WiFi on the Omega so you’ll need to make sure that you’ve established a serial connection with your Omega. For more information, please refer to this guide on connecting to your Omega.
To do this, you will use the uci command to change the wireless of your Omega.
Enter the following command to disable the WiFi client interface, also known as STA:
uci set wireless.sta.disabled=1If your Omega is running a firmware older than v0.2.0, the command will instead be
uci set wireless.@wifi-iface[0].ApCliEnable=0. We strongly recommend upgrading to the latest firmware!
Then run the following command to save your changes:
uci commit wirelessThis will disable the WiFi client interface that is used to wirelessly connect to a router.
Step 3: Changing the Settings of the Omega’s WiFi Access Point
Since you probably don’t want uninvited guests on your new router, it is recommended that you change your Omega’s settings from the default setup, especially the password.
To do so, enter the following commands, substituting OmegaRouter and RouterPassword:
uci set wireless.ap.ssid=OmegaRouter
uci set wireless.ap.key=RouterPassword
uci commit wireless
Restart the WiFi network to apply your saved changes:
wifiChanging the Encryption Type
The default encryption of the Omega’s WiFi AP is set to WPA2. We recommend sticking with WPA2 as it is the most secure.
To confirm the encryption type, you can run:
uci get wireless.ap.encryptionAnd you will see psk2 as the output.
If you wish to keep the default encryption type, you can continue to the next step below.
However, if you wish to change the encryption type, find the type you want in the UCI wireless encryption list, then substitute it into YourEncryptionType and run:
uci set wireless.ap.encryption=YourEncryptionType
uci commit wireless
The options are:
psk2for WPA2pskfor WPA1wepfor WEPnonefor no encryption
Note: If you don’t know what encryption type to use, just keep the default.
Please keep in mind that 1st generation WPA is not secure.
Restarting the Wifi Radio
Once you have finished customizing the WiFi network settings, run the following command to restart the WiFi radio and apply your settings:
wifiEnabling the Ethernet Port
Only needed on firmware v0.1.10 or lower, safely skip to the next step if running a later firmware.
In firmware v0.1.10 and earlier, the ethernet interface was not enabled by default. Enable the ethernet port by running:
uci set network.wan.ifname='eth0'
uci set network.wan.hostname='OnionOmega'
uci commit
Then restart the Omega’s network interfaces:
/etc/init.d/network restartWe strongly recommend upgrading to the latest firmware
Step 4: Enabling Packet Routing
The Omega’s ethernet port is configured to act as a network client by default. So we will just need to configure the Omega to route packets from the ethernet networ interface (wan) to your WiFi AP interface (wlan). To do this, you will be editing the /etc/config/firewall file:
Find the block that looks something like the following:
config zone
        option name 'wan'
        option output 'ACCEPT'
        option forward 'REJECT'
        option masq '1'
        option mtu_fix '1'
        option network 'wwan'
        option input 'ACCEPT'
and do the following:
- Change
option forward 'REJECT'tooption forward 'ACCEPT' - Change
option network 'wwan'tolist network 'wwan' - Add
list network 'wan'after thelist network 'wwan'line
What you will end up with is something like the following:
config zone
        option name 'wan'
        option output 'ACCEPT'
        option forward 'ACCEPT'
        option masq '1'
        option mtu_fix '1'
        list network 'wwan'
        list network 'wan'
        option input 'ACCEPT'
This configuration adds the
wannetwork (which is defined in/etc/config/network) to a firewall zone calledwan. This zone has already been setup to route packets to another firewall zone calledlan, which contains thewlan0interface.
Once you have saved and closed the file, run the following command to restart the firewall with the updated configuration:
/etc/init.d/firewall restartStep 5: Using the Omega Router
And we are ready! To use the Omega Router, you simply need to connect your computer or your smartphone/tablet to the Omega’s WiFi network, and your devices will be able to access the Internet!
Happy hacking!